How to edit photos in photoshop cs6. Efficient Photo Editing in Photoshop
tweet
Photos are different
Adobe Photoshop is a powerful program that allows you to do fantastic things with graphics. There is an opinion that it is possible to cope with it only after a long training. I think that it is enough to know the result of the action of the main tools, the rest will come with experience. To get basic knowledge, it’s enough to read any of You can, maybe I’ll tell you or give training lessons (naturally, not for “thank you”).
Usually, the first two or three chapters of any Photoshop tutorial contain the most necessary knowledge - information about what tools are in the program. The rest is experience. An ambush awaits here - for example, the authors of books use photographs that are clear and bright, without compression artifacts and taken with a professional camera. Objects on them stand out easily, the color is edited too.
It is possible and necessary to learn from books, you just need to understand: the examples of photographs in books are idealized. They only show what can be done. To process what is done on an amateur camera in low light conditions, when the photographer is pushed by the arm and there is no fulcrum, it takes a lot of practice and patience.
Preparation
Let's assume that you have the basic knowledge, the desire to process too. Since my note is about photo correction, You will need a noise filter. This is the only function Photoshop can't handle on its own. I recommend the Ximagic Denoiser. This is a paid filter, without a purchase it starts with a 5-second delay and has a limitation - it cannot be used in Actions (recording actions for processing photos in automatic mode).
I have an English version of Photoshop CC, but you can use older versions. If you have Russian, you can always translate the inscriptions from my article with an online translator.
My classification of photo quality
Terminology may differ from yours. This is fine.
High quality. The photographs were taken with a SLR camera or a good pseudo-SLR. If saved in RAW format - generally great, because you can easily manipulate the brightness, detail. The tips below apply to them too, but don't get carried away - everything you need in the photo will already be there, changes kill quality.
Average. If the photo was taken with a camera expensive phone or “soap box”, you need to enhance subtle details and hide the noise. If the photographer is inexperienced - rotate, crop the photo.
Low. Most of these photos are taken spontaneously in an attempt to capture something interesting while screaming. "Did you film, did you film?" You can work on them too. Made with a phone or a cheap digital camera. Photos are blurry, no detail.
Step 1: Lighten/Dark
Lightening a photo helps bring out details in dark areas. Dimming will help if there are too bright areas (highlights). For example, I took a photo taken with not the best camera:
Menu Image - Adjustments - Shadows/Highlights:
By moving the sliders, you can understand which parameter is responsible for what. In this case, I set the following:
- color V +5 so that the colors do not become acidic.
- In chapter Highlights meaning Amount V 4% to make the sky a little darker. Convenient for dealing with "lights", obscures a light background.
- In chapter Shadows shadow lightening settings. Radius is responsible for how many pixels around dark areas will be brightened and darkened. tone- the width of the range of shadows. Roughly speaking than more value tone, the brighter parts of the image will be taken by Photoshop as a shadow. Amount- power of illumination.
The people at the bottom right of the photo are now visible. Digital noise has also appeared, previously hiding in the dark areas of the image, we will deal with it later.
Step 2: Curves - Adjusting the Color
It's not enough to just lighten up a photo. The color balance needs to be corrected.
I offer the most fast method. It will not allow you to fine-tune the colors, but it will certainly make the photo more natural.
Open Curves - Image - Adjustments - Curves:
It's tempting to press the "Auto" button to quickly adjust the image, but I strongly recommend that you forget about the existence of this button. Let's do everything manually:
Method 1 - dark areas in the photo, painted in shades, for example, red (there is no such thing in the photo from my example):
- First select the eyedropper #1 to select the black point and click on the darkest part of the photo. The black color in the photo will become normal black. If the photo is too dark, click in the dark area again - you may have chosen a pixel that is too bright. In any case, the effect can be weakened.
- Then, using pipette #3, click on the pixel that should be white. It is not always possible to hit that light pixel, due to which the colors of the photo are normalized.
- Click OK in the window Curves. If the colors become too "acidic" or the photo is too dark (light), press Edit - Fade Curves… and move the value Opacity to the left to decrease the strength of the applied effect.
Method 2 - the brightness of the photo is perfect, but the colors are a problem - a lot of red / blue / other tint.
Most often, when photographing indoors with the “Auto” camera mode, the white balance is selected incorrectly.
In the Curves window, select only eyedropper #2 and click on the areas of the photo that should be a neutral gray color. It turns out far from the first time, sometimes you need 20 clicks on different parts of the photo, but the result is magnificent - the colors in the photo will be natural.
Methods 1 and 2 can be combined.
Method 3 - Enhance colors and change hue in Lab Color mode.
The photo above is missing shades. The photo was taken at sunset and the sky was painted in shades from blue to pink, which is not visible in the photo. The reason is simple: the camera cannot capture as many colors as the eye can see.
You can use a trick that I saw in Dan Margulis' Photoshop LAB Color. The mystery of the canyon and other adventures in the most powerful color space":
- Image - Mode - Lab Color. So we switch to color mode Lab - the most powerful tool Photoshop to manipulate color and brightness separately. Some professionals refuse to use this mode because the colors are distorted a little (by a fraction of a percent). In our case, it does not matter at all, you can use it.
- Image - Adjustments - Curves. In the window, select color channels in turn a And b by setting these settings:
Channel a just tighten
Channel b shrink and shift the center to the left
What gives symmetrical channel contraction a And b? If you move them the same distance, weak colors become more saturated, while saturated ones do not change. Ideal for enhancing the color of the sea, sky, everything monotonous. You can shift more than in the screenshots below, but do not overdo it - no one likes acid colors. By the way, if you do not see the difference between the standard values a And b, tightened as in my screenshots - you have a bad monitor.
Shifting the center of the channel curve adds a certain tint. Perhaps, in your case, you need to shift the center of channel a and not to the left, but to the right.
The third method can be used either together, or instead of the first two.
There are some tints in the sky, especially in the bottom left of the photo.
Step 3. Increase the contrast
Method 1 is simple.
1. If you worked in the mode lab, do Image - Mode - RGB Color.
100% View - 100% or ctrl+1.
3. Make a copy of the photo layer:
4. Set the new layer above the background layer to Overlay blending mode:
The photo will become darker - no big deal.
5. Apply the filter to the created layer: Filter - Other - High Pass:
small value Radius allows you to increase sharpness, large - contrast. Usually, to enhance the contrast, you need a value Radius between 30 And 80 pixels depending on the size of the photo.
6. Weaken the effect of the filter by adjusting the transparency of the layer ( Opacity) to which the filter is applied. In the screenshot above, it is clear that the photo has become too contrasty. Let's make the effect weaker:
By increasing the contrast, the photo has become more voluminous:
Method 2 is tricky, but I like it better.
You may have noticed that, in principle, the contrast in the photo above has not increased much, but the light above the roof of the house on the left has become more noticeable. Is it really impossible to increase the contrast without color distortion? Of course you can:
1. If you haven't done it before, do it Image - Mode - Lab Color.
2. Set the image scale to 100% (one to one with monitor pixels): View - 100% or ctrl+1.
3. In the layers palette Layers click on layer lightness. The image will turn black and white because only the brightness of the image will be displayed. Turn on the visibility of all channels:
Only luminance channel selected, but all of them visible
4. Now you need to run the sharpening filter: Filter - Sharpen - Unsharp Mask:
Photoshop filter unsharp mask creates light and dark zones in those parts of the photo where bright and dark pixels meet. This is convenient, because you can not only increase the sharpness, but also competently increase the contrast. You just need to install more value radius. Description of settings:
- Amount- the strength of the applied effect.
- Radius- halo width of brightened and darkened pixels.
- Threshold- the degree of protection of low-contrast areas of the photo from changes.
Install Amount to the maximum and start changing Radius and Threshold. Then you will understand how the filter works.
In this case, I set for the photo Radius V 13,2 pixel and Amount V 31% . I liked just such parameters, it came up to enhance the shadows on the boat. After a couple of dozens of processed photos, you will also be able to determine by eye what parameters to set for the best result.
To understand what has changed, a comparison of the problem area itself:
Other Contrast Enhancement Options
The same actions can be done in different ways. For example, in the mode RGB call Curves and make an S-curve of all channels. Or simply Image - Adjustments - Brightness/Contrast. I prefer to use unsharp mask in color space Lab due to the fact that then the colors are distorted less than if I increased the contrast in RGB mode (this also applies to sharpening).
Step 4 Remove Noise
Lightening, then increasing the contrast more revealed digital noise, which really creeps into the eyes. Details are distorted due to noise, the fisherman's face looks like a monstrous mask:
Fisherman - Jason Voorhees?
Unfortunately, Photoshop does not have effective means noise suppression. Therefore, a separate plugin filter is needed. I use Ximagic Denoiser. Other good plugins are Imagenomic Noiseware and Topaz Denoise, both of which are paid.
Removing color noise
First you need to remove the colored spots. Filter - Ximagic - XiDenoiser(hope you installed it?):
The colored spots on the water are gone
How to work with it:
- Bet Working-YCbCr or Lab(results are almost the same).
- Denoise - Color denoise(elimination of color noise).
- Learn radius- not more 9 , Compare radius- not more 3 (for values greater than the result almost does not improve, but the filter will work 10 times slower).
- Move the slider Spatial sigma and press Partial preview- in the preview window will be the result. All your attempts are saved in a list, so you can return to your best score with a click of the mouse.
- When you are satisfied with the result, press OK and wait for the full processing.
Color spots should be gone. Too high values Spatial sigma very smooth colors, do not overdo it.
The fisherman's face still resembles a hockey mask, and in general the photo is "furry". It is necessary to remove the luminance noise so that the details of the image do not disappear.
2. Run again XiDenoiser, the settings will be different (instead of Color denoise - Std denoise):
3. Learn radius And Compare radius still no more than nine and three. Adjusting the value Spatial sigma. We need to remove the smallest noise, so Spatial sigma unlikely to be more 30 .
4. After applying the filter, duplicate the bottom layer again and make it the highest. We start again XiDenoiser, value only Spatial sigma put twice as much the previous one.
Thus, first we remove small noise, then we smooth out solid surfaces:
Before removing luminance noise
Step 1: Spatial sigma = 24
Step 2: Spatial sigma = 48
It remains only to reduce the transparency of the topmost layer so that the image is no longer cloudy:
If there is skin in the photo (for example, trying to refine your selfie), reduce the transparency of both layers with the noise removed so that the noise is just a little visible. This is necessary in order for the skin to look natural, without the effect of plasticity. Of course, there are ways to give the skin a natural look after any manipulation, but it is better not to allow such a situation at all.
When photographing inanimate objects (houses, objects), the picture can be smoothed more.
Step 5: Add Sharpening
The sharpness of a photo is the contrast between dark and light areas. The higher the contrast, the clearer the photo appears to us. Contrast enhancement and sharpening are the same operations with different settings.
1. Make a copy of the layer with the result of your manipulations ( Select - All, Edit - Copy Merged, Edit - Paste).
2. Select the created layer - Filter - Other - High Pass(yes, like in the third step):

Hi all! Today I want to tell you how to process photos in Photoshop for beginners or those who have just recently started learning this wonderful editor. It's no secret that sometimes photos turn out, to put it mildly, not the way we expected to see them. Either they are too dim, or bright, a lot of acne, then the sharpness is not best quality. Therefore, today I will try to tell in an accessible language how to fix this.
Eliminate skin defects
First of all, I recommend looking at people, if there are any in the photo. The first thing that is important in processing is the identification of defects. In this situation, I mean acne, scars, herpes (God forbid), from an outbreak, scratches, emerging hair, bruises, etc.
I do not see much point in writing in detail about this, since I have a separate article for each of the cases. I would just like to list a few tools that usually eliminate defects.
- Patch. Select this tool and select the problem area of the skin with it, then drag it to a healthy area by holding down the left mouse button.
- Healing Brush - Before using the tool, you need to select the donor area by holding down the alt button. And then you will need to paint over all pimples, blackheads, etc.
- Precision repair brush. This tool is also designed to cover up defects, but differs from the “brother” in that it is not necessary to select the donor area. He takes information from neighboring areas.
I described all these methods in an article about. You will see for yourself that it is not difficult.
Applying a Camera RAW Filter: Editing a Photo in a Minute
This method is insanely simple. Filters are used by many photographers. I would even say differently. They initially shoot in the format CR2 which is essentially higher quality. After that, by going into Photoshop, this filter is automatically turned on.
But in fact, there is no trouble, since starting from the version of Photoshop CS5, the filters have been replenished with a new brother. I hope that everyone has been using a more advanced version of the editor for a long time.
Main Feature this method is that absolutely anyone can handle it, even a beginner and a complete zero, since everything happens in only one single filter, which only intuitively needs to be adjusted a little. Let's use this photo as an example.


Looking at the stories at the beginning, you can see for yourself what wonderful changes have taken place with photography. I just think it's excellent.
Using the Adjustment Menu on a Single Layer
This way of processing photos in Photoshop is quite rough, but for novice users it will do.

Now you can compare the changes. They may not be particularly large, but the processed photo clearly looks better. Of course, the absolute disadvantage of this method is that you cannot return to the previous step and edit it. But there is a way to do this, and I will talk about it below. Well, in general, see other functions for yourself and turn the sliders. Perhaps you will find something interesting for yourself.

Processing a photo with adjustment layers
This method of processing photos in Photoshop may seem complicated for beginners at first glance, but in fact it is very simple, and any user can handle it.
Adjustment layers
A great photo editing feature that doesn't require any special skills. The essence of this method is that we apply each function on a separate adjustment layer, of which we can have a great many. And in fact, it is much more convenient than the method that we did above.
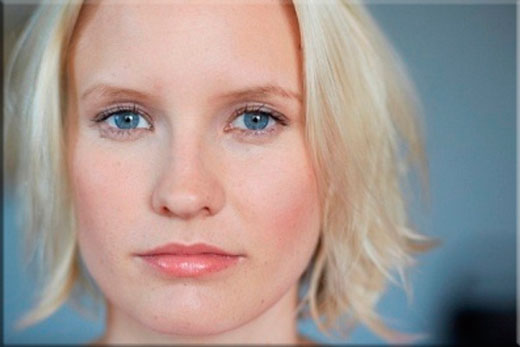
For example, I took a photo with a girl, rather faded shades. She herself begs to be made brighter, more saturated and simply to please the soul.

This completes the work with adjustment layers, but we have to move on.
Area selection
Now we have to work with some areas separately, since applying effects to the entire image at once will not end in anything good. For example, we need to make the sky brighter, more saturated and bluer, and if we apply everything to one photo, then our girl will also apply everything to herself. Therefore, let's do the following.
- Select a girl with any of the . I'll use , because I think it will fit perfectly here. We begin to single out the girl. Do not chase accuracy too much, but the main thing is that the whole body is captured, or rather, its naked parts and face.

- Now, be sure to make sure that you are on the background layer with the girl, then right-click inside the selection, and select "Copy to new layer".

- After that, the cut out girl will appear on a new layer, which is above the background one. Your task is to put it above all so that the adjustment layers do not affect it. To do this, hold the button on the new layer and drag it above the rest.

- Now go back to the background layer and start selecting the sky. In this case, I decided to use the . Select a brush, and then click on the quick mask button itself, and then start painting over the entire sky, remembering to change the brush size to get into more hard-to-reach places.

- After that, click again on the quick mask to deselect it. Next, we will need to invert the selection so that we work with the sky, and not with what is around it. To do this, press the key combination SHIFT+CTRL+I.

- Next, you will need to add some saturation. To do this, without removing the selection, press the key combination CTRL+U, then move the Saturation slider a couple of dozen units to the right. You can also play with the brightness until you reach the most interesting shade.

- Now back to the girl. No wonder we carried it. Since we moved it from under the adjustment layers, it became pale again, as it looked originally. But if this is not done, then on the contrary it will be too dark. And now we can find the right balance. To do this, we need to reduce the opacity of our copy of the girl until it seems to you that enough is enough. In my case, 33 percent is enough.

Outcome
Having studied several various ways, I came to the conclusion that if you want to make fast and high-quality processing, then it will be enough to use the Camera RAW filter in Photoshop. He showed himself perfectly, and the time it takes to process a photo even for novice users really takes 1-2 minutes.

The only thing I would not recommend is to create an action for this case and start streaming photo changes. Even if the pictures were taken by the same photographer on the same day, the settings that you made for one picture may not be suitable for them. I know that many unscrupulous wedding photographers do exactly this to save time. You see, they are reluctant to process 300-400 photos one at a time.
But if you really want to do high-quality photo processing, as you are drawn to this, then I highly recommend checking out these cool video tutorials, which clearly explains how to use Photoshop for awesome photo processing.
And if you are new to Photoshop, then the first thing I recommend is to study this course. Everything is literally chewed up to the smallest detail and looks just in one breath. . And most importantly, everything is told in human language, so you don’t even want to be distracted.
As you can see, there is nothing complicated. Therefore, no one should have questions about how to process photos in Photoshop for beginners. At least I am sure that these tools will be enough for you.
Well, this concludes my article. Hope you like it. Do not forget to subscribe to my blog updates, as well as follow the news in my publics. Good luck to you. Bye bye!
Sincerely, Dmitry Kostin.
Inspired by another brilliant idea and want to quickly bring it to life with the help of a camera? If you're just starting out on your photography journey, don't rush! First, learn the basics of this art. In the article we will tell you what problems beginner photographers most often face. You will also learn how to process photos in the PhotoMASTER editor and get rid of most of the defects.
Mistake #1. Incorrect framing
Having studied the rules for constructing a frame composition, you will know that the location of the subject strictly in the middle will make any photo boring and inanimate. To get a dynamic and interesting picture, mentally divide the future frame into 9 parts. Place everything important next to the lines or at the intersection points:
Have you already taken a photo, forgetting about the rules of composition? All is not yet lost! Our "PhotoMASTER" will quickly correct the situation. Use the crop function. Turn on the grid, and then adjust the size and position of the frame on top of the photo. Click "Apply" and all changes will be saved.

Mistake #2. The horizon is littered
You can even see this defect with the naked eye. The horizon line in the photo does not run parallel to the bottom and top of the frame, but goes up or down:

To correct the horizon, go to Composition > Geometry. Check the boxes next to Crop Automatically and Show Grid. Align the photo on the Rotate scale. If necessary, adjust the Vertical and Horizontal parameters.

Mistake #3. Lighting problems
Shooting against the sun, an unconfigured camera, a disabled flash in the dark ... All this leads to one thing - exposure problems. The photo becomes too overexposed or dark:

Photo editing will help solve the problem. In PhotoMASTER and adjust the tone of the photo. Move the slider to the right on the Exposure scale to brighten the photo, to the left to darken it. If necessary, correct the dark and light tones in the picture, as well as shadows and excessively overexposed areas.

Mistake #4. red eye
A similar defect occurs due to the use of a flash. But you can try to prevent it from appearing in the photo in advance: to do this, ask the “model” not to look directly into the lens when shooting.

You can get rid of red eyes with a corrector. You will find it in the "Retouch" section. Adjust the brush and select one of the problematic pupils. Turn down the saturation and experiment with tone. Then edit the second eye in the same way and evaluate the result in the preview window.

Mistake #5. Blurred photo
If the photographer hurries to press the shutter button while shooting, the camera will not have time to focus. When viewing a photo from a PC screen, you will notice that the photo has become blurry:

The problem can be fixed in the editor in several ways. For example, if the entire photo requires adjustments, then in the “Improvements” section, go to the “Sharpness” tab and select the optimal parameters for the image by adjusting the strength, radius, and sharpening threshold.

If you need to improve only a fragment, then use an adjustment brush (Retouch > Corrector). Highlight the area to be corrected. Then click on the "Sharpness" button and adjust the sharpness of the area.
Mistake #6. Extra objects in the frame
Captured a landscape, but a shadow got into the frame? Have portrait photos ruined pimples, flaking, and redness on your skin? Do not rush to delete pictures! Use the stamp tool. With it, you can remove all unnecessary elements, and much more. For example, in this photo we got rid of the shadow:

Adjust the brush settings and select the element in the photo that you want to mask. Then specify the location where the editor needs to copy the pixels to fill the selection. Ready!

Mistake #7. geometric distortion photo
Another problem that novice photographers often encounter. Such defects arise due to shooting objects, buildings or people from a lower or upper angle, and sometimes even simply due to lens error. This leads to the appearance of "falling buildings", distortion of figures and other unpleasant consequences.

Alas, not all geometric distortions can be corrected. But it's always worth trying! In PhotoMASTER, go to Composition > Geometry. Turn on the grid and try to align the photo using the "Distortion", "Horizontal", "Vertical" scales.

Summing up
We've broken down the most common mistakes beginner photographers make, which means you can avoid them. If unsuccessful shots still take you by surprise - it does not matter! After all, you know how to properly process photos. Install PhotoMASTER on your PC and say goodbye to bad pictures forever!
Good post-processing of photography is an art, it is a complex matter that requires considerable experience and skills. Even in the era of highly developed digital technologies and in the era of Photoshop, the main work remains with the photographer, who can create a masterpiece with the help of successful processing, or vice versa, ruin a good picture. In this article, we will dwell on the main intricacies of graphic processing, tell you how best to process, and what is better not to do at all.
Film photos require certain conditions to work with the image, while photos taken with digital cameras we can make stunning and properly balanced right in the camera. Depending on the manufacturer and camera model, the quality of the image really differs, but taking beautiful pictures, with the right composition, taken in good lighting and settings, as well as filled with interesting meaning, can be improved. To do this, the main thing is to know what and how to do.
Photo: LJ
Only a photographer or an artist knows what his work should be, only he sees what is missing in it, and what is better to remove. The task of the photographer is to achieve the result to which he aspires.
Depending on what you want to achieve in your image, there are several options for post-processing the image.
- Take a beautiful photo while keeping it natural and realistic
- Give the image more drama, create an unrealistic image
One option excludes the other, so before starting work, you should decide what exactly you are striving for. An important point is to understand what and why you are doing, very often, people process the image for several hours, just because they simply do not know what result they are striving for. There are times when you can process an image in just a few minutes, simply by creating a few adjustment layers, adjusting the contrast, color balance and exposure in Photoshop.
 Photo: Phil Selby
What is needed for photo processing
First of all, before starting work, think about what you want to do. Imagine the future image and only then download Photoshop.
Presenting the final result and finding an image suitable for this image is already half the battle.
Be creative, photo editing is an art in itself that cannot be learned and can never be fully replicated. Of course, you should get acquainted with the works of the masters, but you should not try, as they are. Yes, and before starting serious work, you should decide what Photoshop tools you need, you may have to use some brushes or filters that you don’t have, before starting processing, take care of their availability. The process itself, the result of the work, depends only on you, and on your vision as an artist.
 Photo: Gina
What not to do when editing a photo
- Don't try to imitate the processing style of others, yes it can work and work well at times, but their style may not suit you as an artist and your photographs.
- Don't try to salvage initially bad shots with post-processing. Yes, this way you can improve the image, and make it acceptable for viewing and maybe even printing, but a real masterpiece will never come out of such a photo.
- Make sure the processing doesn't change the essence of your original image.
- Don't overdo it. Don't show off your skills and knowledge of Photoshop by applying them all at the same time in one photo.
- The presence of a huge number of advanced imaging packages can either kill art or elevate it to a new level. Approach processing wisely, think about what and how you do it.
 Photo: Betina
Conclusion
Find that delicate balance that will help you learn how to work wonders and take amazingly beautiful photos. Always remember that processing should help the image to become better and more interesting, it certainly should not spoil your work.
And finally, people looking at your photo should enjoy it and admire your skill as a photographer. You should not be proud of the fact that you know how to process images well and are just a Photoshop guru, you should strive to be proud of yourself as a photographer.
 Photo: Ed McGowan
 Photo: Longbachnguyen
 Photo: David Butali
At one time, computer processing of photos was considered a rather controversial idea. The possibilities of programs like Photoshop for processing photos were used very carefully, almost secretly. In order not to end up with accusations of a “not real” photo. But now the photo processing is completely natural process and disputes, if any, are only about what is considered the boundary of reasonable processing.
Be that as it may, below are 6 basic steps in order to make a better photo using a photo editor. We can say that this is a template scheme for basic image processing. The steps are listed in the most convenient order, from first to last.
For example, sometimes it's worth cropping a photo first so as not to waste time processing areas that will still end up outside the frame.
It is not necessary to apply all steps for every image. For example, if the image is well exposed, then leveling may not be necessary.
The steps below are just to keep in mind as a general outline of how processing is going. Upon completion of the work, we recommend clicking " save as' and save the result under a different name. Thus, you will always have the original photo if you need to change something or do it differently.
For most of the actions listed below, you do not even need Photoshop, almost any photo editor, even those that are built into photo viewers, allows you to perform these operations. This article, for example, uses a "light" version of Photoshop - Adobe Photoshop Elements
Step 1: Crop the picture
The cropping operation (crop, cropping) is in any photo editor. When you select the crop tool, a frame will usually appear on the picture, which you can drag on the squares at the corners or sides. This way you can choose what goes in the frame and what stays out of the frame. In addition, you can align the horizon by making a rotational movement in the area of the corner squares of the frame.

Also note that in some editors, the crop tool has a grid that divides the image into 9 equal parts. This is very handy for adjusting the shot to the rule of thirds.
Step 2. Cleaning up traces of dust
If you have a digital SLR, then dust often gets on the matrix. Especially when replacing one lens with another. The easiest way to notice dust is in a single-color shot taken with a clamped aperture. For example, at f/16 and above, dust will be visible in the sky as a blurry dark spot.
The more the aperture is clamped, the sharper the spot.

Similar spots in visible places of the image are removed with the Healing Brush tool (Lightroom, Photoshop, etc.) or “stamp” (Clone Stamp)
Step 3. Levels or Curve
To make a picture more interesting, sometimes it is worth increasing the contrast, making the light areas of the image lighter and the dark areas darker.
The easiest tool to do this is to use the tool Levels (Levels), more complex - Curves (Curves)
Actually curves, the tool is not much more complex, but requires an understanding of what you are doing.
The levels are simple. In fact, you just need to look at the histogram and drag the far left (black) triangle to its left edge, and the right (white) triangle to its right. Or use the Auto Levels feature

Step 4: Increase Saturation
The next step could be to increase the color saturation (Saturation). The picture will become more juicy and bright.
The most important thing here is not to overdo it. A shot with exaggeratedly bright flashy colors looks unnatural and cheap.

Step 5. Convert to black and white
Black and white photographs have always been valued in photography. Try converting the photo to black and white, maybe he will only benefit from this.
It is worth considering that a high-quality translation into a black and white image is not as simple as it seems. Therefore, for this purpose, it makes sense to use pre-installed presets or ready-made solutions (plugins, actions, etc.) if there are any in the editor.

Step 6 Sharpen
Majority digital pictures require image sharpening (sharpening). How much to sharpen depends on the specific image and its purpose. For display on a computer screen - one thing, for printing another.

Depending on the editor, one or more parameters working together may be responsible for sharpening.
Summarize
As already mentioned at the beginning, the purpose of this article is not to tell in detail how to process a picture, but to outline a typical scheme of sequential actions that are usually followed when processing a photo.

Let's repeat all the steps in a nutshell:
- Crop and Rotate
- Removing traces of dust on the matrix
- Level or Curve Correction
- Increasing color saturation
- Try converting to black and white
- Sharpen


