Installing Ubuntu 17.10 next to Windows 7. Installing Ubuntu next to Windows
This guide walks you through the installation process of Ubuntu Linux step by step. Installing Ubuntu is very easy and quite fast. With the release of each new version of Ubuntu, developers try to simplify the system installation process as much as possible. In this guide, I will walk you through the complete Ubuntu installation process, with each step accompanied by a screenshot and description. As a rule, users have the greatest difficulties only with disk partitioning; everything else is no more difficult than installing some program. We will look at the process of installing Ubuntu on empty HDD, as well as installing Ubuntu next to Windows, that is, the case when you already have the Windows operating system installed and want to install Ubuntu next to it.
Before starting the installation, you must prepare the distribution kit - write it to a disk or USB drive (flash drive). You can install Ubuntu from a bootable USB flash drive (if the BIOS supports booting from a USB drive) or from a CD/DVD disk. All preparatory processes are described in the following articles:
- Burning an iso image to disk - for installation from a CD/DVD.
Writing an iso image to a USB drive (creating a bootable flash drive) - for installing Ubuntu from a flash drive. - — this item only needs to be completed if you already have Windows installed and want to install Ubuntu next to it.
This guide walks you through the installation process of Ubuntu 12.04. Other versions of Ubuntu are installed in exactly the same way.
Updated: Ubuntu 18.04 installs similarly. Feel free to use this guide.
First of all, you download the Ubuntu distribution kit, then burn it to the desired media (flash drive or disk). If you want to install Ubuntu next to Windows, then you pre-allocate free disk space. Then you restart your computer, configure the BIOS, and boot from the disk (or flash drive). You can boot either into a LiveCD system (a system that works without installation on the computer directly from the disk) or you can start the installation process without loading the LiveCD system. Let's look at the entire installation process step by step.
If you are installing Ubuntu for the first time and do not have sufficient experience, then it is highly advisable to backup your important data (copy it to another medium). Naturally, this is true if you are not installing Ubuntu on a clean computer.
Starting the Ubuntu installation
Let's assume you have already inserted a flash drive or disk and turned on the computer. The installer should start downloading. The following window will appear in front of you (let's call it the splash screen).
The not-so-informative keyboard icon at the bottom of the splash screen means that if you press any key on the keyboard, you'll be taken to a menu.
If you do not click anything, then the download will continue and the following window will appear. On the left in the list you can select a language (this language will be used in the LiveCD system) - select Russian. Next you can click the button Try Ubuntu to boot into the LiveCD system and start the installation from there, or immediately press the button Install Ubuntu. I advise you to boot into the LiveCD system, so click the button Try Ubuntu.
If you press an arbitrary key while the splash screen is displayed, then the language selection menu will be displayed. Use the arrows to select Russian and press Enter. 
A menu will appear in which we select the first item Run Ubuntu without installing it on your computer. Thus, we will boot into the LiveCD system, and from there we will launch the installation. If for some reason the LiveCD system does not start, then you can select the second option and begin the installation immediately. 
When you boot into the LiveCD, you need to double-click on the icon on the desktop Install Ubuntu (Install Ubuntu).
Language selection and initial settings
The first thing we will have to do is select the language of the future system (Ubuntu will be installed in the same language). Choose Russian and press the button Continue.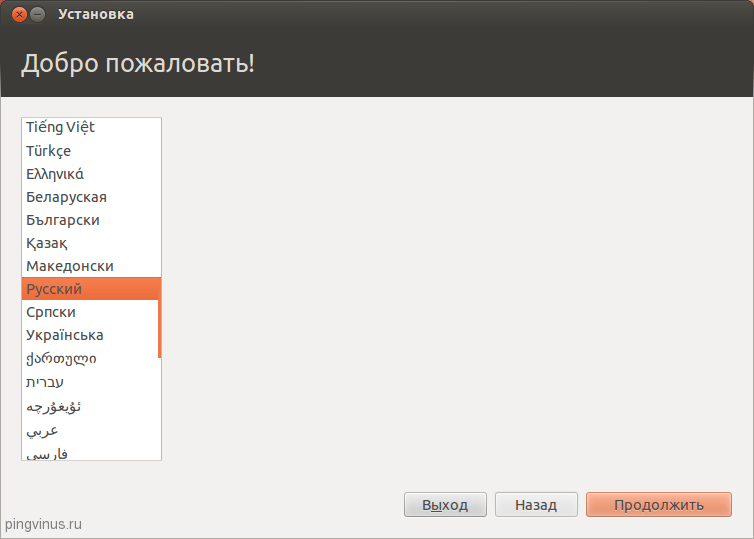
On the next window, “Preparing to install Ubuntu,” you are asked to check two boxes: “Download updates during installation” and “Install this third-party software.” If you select the “Download updates during installation” option, then during installation all the latest updates will be automatically downloaded from the Internet and installed (as well as localization files). I note that in this case the installation will take longer. If you do not currently have an Internet connection, you can update the system after installation. The second option (check mark) means that you agree that some closed source components will be installed (for example MP3 codecs and FLASH). I advise you to check two boxes, then press the button Continue.
Disk partitioning
We have come to the stage that causes the most difficulties for beginners - this is the partitioning of the hard drive (hard drive). I will try to briefly describe some basic principles of hard drive partitioning.
Each hard drive can be divided into several parts, these parts are called partitions (or partitions). For example, if you use Windows, then you may have only one partition - your C drive, or, for example, the hard drive can be divided into two parts - into two drives C and D (into two partitions).
Ubuntu Linux must be installed on a separate hard drive partition. The Linux file system has a specific directory structure. The root of the file system is designated as “/” (slash), all user data is stored in the /home directory (if we draw an analogy with Windows, this is something like the My Documents folder), the bootloader is located in the /boot directory, and so on. And you can put /home on a separate hard drive partition, /boot on another, and the rest of the “/” filesystem (aka system partition) on a third. In the simplest case, you need to create just one partition on your hard drive for the root “/”. There is also special type The partition of the hard drive that Linux uses is the swap partition. A swap partition is an area on the hard drive that Linux can use when it is short of random access memory or you need to dump the operating system (the computer goes into sleep mode - hibernation - hibernate).
As I already wrote, in the simplest case you only need to create one section. However, it is better to create at least three partitions. The first is the root partition (with a volume somewhere between 30-50GB), the second is the /home partition (the volume is usually taken to the maximum) and the third is the swap partition (the volume is usually taken equal to the amount of RAM). In this guide, I create exactly three sections.
For reference: 1GB = 1024MB, not 1000MB. For simplicity, during installation, I consider that 1000MB is 1GB, so I indicate the sizes in multiples of 1000. The installer himself adjusts them a little.
There are three types of partitions: primary, logical and extended. An extended partition is simply a combination of several logical partitions.
For MBR partition table There can be only 4 primary partitions for each hard drive (including extended). There can only be one extended section. There can be as many logical ones as you like. Windows is usually already installed on the primary partition, but Linux partitions can be combined into one extended partition. To do this, during installation you just need to specify that the type of each partition will be logical, then Ubuntu will automatically place them in one extended partition.
For GPT partition table(GUID Partition Table) there is no concept of logical and extended partitions. On disks with a GPT table, only primary partitions are created. You can create 128 partitions on one GPT disk.
Hard drives in Linux are referred to as sda, sdb, sdc, etc. Each partition on the disk is named sda1, sda2, etc.
If the disk uses an MBR partition table, then the first four digits are used to designate primary partitions, and the rest are used for logical partitions. For example, you can partition the disk like this:
sda1 - primary partition with Windows
sda2 - extended partition:
- sda5 - logical partition /
- sda6 - logical partition /home
- sda7 - logical swap partition
Each hard drive partition can be formatted with a specific file system. Under Windows, Fat32 or NTFS file systems are usually used. There are several file systems for Linux, but at the time of writing this guide, the best one is Ext4, so I will format all Linux partitions in Ext4.
Below are two ways to install Ubuntu. The first method is to install Ubuntu on a blank hard drive when you have a completely empty or new hard drive. The second method is to install Ubuntu on a hard drive that already has Windows installed. In the second case, when you start the computer, a menu will appear (GRUB menu), in which you can choose which operating system to launch.
Installation on a new (clean) hard drive
Installing Ubuntu on an empty hard drive is one of the easiest, since you don't risk damaging important data or accidentally formatting existing partitions on the drive. If you have a new and empty hard drive that does not contain other operating systems, then the following window will appear in front of you. You can select the first item, then the installer will do everything automatically, but we will select the second item and partition the disk ourselves the way we want. So, select the “Other option” item and press the button Continue.
A window will appear with a list of disks and partitions. Since there are no partitions on the new hard drive, the list will simply show your hard drive /dev/sda. First of all, we need to create a partition table. Please note that your partition table may already have been created and you can skip this step. Click the button New partition table.
A warning will appear, click the button Continue.
A new partition table will be created and the disk layout window will look like the one shown in the screenshot below. Please note that you can now see the current disk volume (free space). Now we will create three partitions (root /, home and swap. To create a new partition, click on the inscription " free place" and press the button Add.
As I already wrote, we will create three sections. The first will be the root / partition of 30GB in size, the second home partition of 218GB and the swap partition of 2GB in size. When creating partitions, we will specify that all partitions must be logical. The installer will automatically create an Extended (extended) partition and place our three logical partitions in it.
So, the window for adding a new section has opened in front of us. I specified the partition type as Logical, the size in megabytes is 30000MB. The location of the section was indicated by Home. Ext4 file system and mount point / (root partition). After setting all the settings, press the button OK.
Now the window with a list of disk partitions will contain our root partition. At the same time, the amount of free space will decrease accordingly. Now let's create a home section. Click on an item in the list free place and then the button Add.
In the window for creating a new partition, again select the partition type Logical. I allocate maximum space for the size of the home partition, therefore, since I decided to leave 2GB for swap, then we define the size of the home partition as the current free space minus 2GB. In my case it is 218GB. We indicate the location Start, Ext4 file system, and mount point /home.
The home section will be added to the list of partitions. All that remains is to create a swap partition. Select an item from the list free place and press the button Add.
In the partition creation window, specify the type again Logical, size 2000MB (all remaining free space), location Start. In point Use as choose: swap partition. There is no need to specify the mount point. 
As a result, we ended up with three partitions on the hard drive. Now we just have to select the device on which the bootloader will be installed (in the “Device for installing the system bootloader” list at the bottom of the window), in our case we select /dev/sda (the bootloader will be installed on our hard drive). In fact, the partitions have not yet been created or formatted; we have only compiled a list of actions for the installer. Please note that the checkmarks in the column Formatting should be opposite the root and home partitions. For the last time, check to see if you have entered everything correctly and click the button Install now.
Installation next to Windows
Quite often, users install Ubuntu side by side (in parallel) with Windows. In this case, when you boot your computer, you will be able to choose which system to start. We will assume that you have already allocated enough space on your hard drive to install Ubuntu. If you have not already done this, then follow the instructions described in the article “Preparing a disk in Windows before installing Ubuntu”.
In my case, I have Windows installed on my laptop, which is located on a 42GB partition and I have allocated 105GB of free space for Ubuntu, plus there is a hidden 1.5GB partition where Windows recovery files are stored (since the laptop was purchased with the system pre-installed).
So, the installer will automatically detect that you already have Windows installed and offer you several options for installing Ubuntu. Namely: automatic installation next to Windows, complete replacement of Windows with Ubuntu and manual installation (manual partitioning of the disk to suit your needs). 
If you select the second option, then all data on the disk will be deleted and as a result one Ubuntu will be installed.
If you select the first item, then Ubuntu itself will automatically install itself in the free space that you allocated to it (for me it is a 105GB partition). In this case, the disk will be divided into only two partitions: root / and swap. This is what my disk looked like after this installation: 
I advise you to use manual disk partitioning, so select the third item labeled “ Another variant"and press the button Continue.
A window will open showing the structure of your hard drive (or drives, if you have several). It clearly shows disk partitions, their sizes, file systems and occupied space. In the screenshot below you can just see the ~1.5GB partition (recovery partition for Windows), about 40GB is used for Windows and more than 100GB of free space that we left for installing Ubuntu. Click on the line " free place" and press the button Add.
The window for creating a new partition will open. First of all, we will create a root partition “/”. Selecting the partition type Logical, I installed the volume ~18GB, location " Start", Ext4 file system and mount point "/". 
After adding the root partition, the disk structure will look like this. Click on the line again free place"and press the button Add.
Now we will create a home partition. I allocated all the available space for it minus 2 gigabytes, which will go to the swap partition. The settings are as follows: partition type “Logical”, size ~93GB, location “start”, file system Ext4 and mount point /home. 
After adding the /home partition, we get the following disk structure. We have just 2GB left for the swap partition. Click on the line " free place" and then the button Add.
All we have to do is create a swap partition. Select the partition type Logical, set the size equal to the remaining 2GB, location Start and in the “Use as” field set the item “ swap partition", you do not need to select a mount point (the field will be locked). 
As a result, we get the following hard disk structure. And the last thing we should check is the bottom option “Device for installing the system boot loader”. In the drop-down list you must indicate your hard drive (I have /dev/sda, on which we did all the partitioning), the GRUB system boot loader will be installed on it. 
Additional settings
The system installation process will begin. At the same time, you will be asked to perform some custom settings. On the first screen you must select the city (country) you are in: 
Next, select the keyboard layout and press the button Continue. I have selected from two lists Russian.
Next, you must create a primary user.
In field " your name» enter your full name.
In field " Computer name» specify the name of the computer, for example - my-home-pc.
In field " Enter your username»Indicate your username (in small Latin letters). It is advisable to choose a username that is not very long and simple, and this is what your home directory will be called later (in my case it is /home/yuriy).
Below you must enter your password and password confirmation. Please note that you will then enter this password when logging into the system, as well as during any administrative system settings (for example, when updating or installing programs).
Press the button Continue.
You may then be asked to select a picture for your user (avatar). Since my laptop has a built-in web camera, the installer suggested that I take a photo of myself (button “ Take a photo»). ![]()
Next, the installer prompts you to import Accounts from other operating systems. For some reason, it didn’t offer to import data from Windows 7, but usually you can import some user data (for example, bookmarks from Windows), but I’ve never done this. So we just press the button Continue.
Copying files
Now the further installation process will begin and you will be able to view some presentation of the system (slideshow). The installation will take a few minutes. 
Restarting the computer
Finally, when the installation is complete, a message will appear asking you to restart your computer. Since I started the installation from a LiveCD system, I am also prompted Continue acquaintance with LiveCD system. Press the button Reboot. Most likely, you will also be asked to remove the flash drive (if the installation was from USB) or remove the disk (or the CD-ROM will open automatically), otherwise when you reboot, you will start autoloading from the CD/flash drive again. 
First start
After the computer restarts, the login window will appear in front of you. You must enter the password (which you provided when installing Ubuntu) and press Enter. 
The Ubuntu desktop will boot. At this point, the Ubuntu installation can be considered complete. After installation, as a rule, a window will immediately pop up asking you to additionally install the system localization files, as well as perform a system update (if this was not done during the installation phase). 
This article will discuss installing the Ubuntu Linux 14.04 LTS distribution on a computer that already has Windows 7 installed. Using the same article, you can also install earlier releases of Ubuntu, for example 12.04. This is enough simple instructions how to install Linux Ubuntu 14.04 on top of Windows 7 or 8. You don't need to know anything about multibooting or disk partitioning - just look at the pictures and repeat.
It is implied that on your Windows computer 7 is already installed in one of the most common options:
- One solid partition (drive C:) for the entire hard drive.
- Two partitions - a Windows system partition and a second one for data.
If you have Windows 8.1 or Windows 7 with UEFI boot, then read additionally new article- "Ubuntu Linux 12.04 with Windows 8.1". You may have to install a 64-bit version of Ubuntu in order to use UEFI boot.
Step one - download Ubuntu 14.04
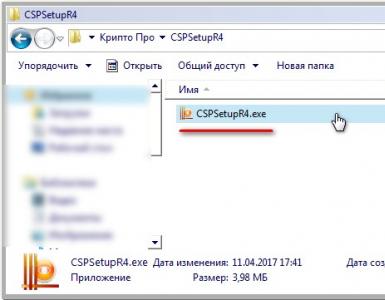
In order to install Ubuntu, you first need to download the Ubuntu Desktop distribution (disc image ubuntu-14.04-desktop-i386.iso or ubuntu-14.04-desktop-amd64.iso) from www.ubuntu.com. Then burn this image to a laser disk or USB flash drive. If you use Windows, you can prepare a bootable USB flash drive from the Ubuntu image using the Universal-USB-Installer program.
For this article, a 64-bit Ubuntu Desktop distribution was used, but for a 32-bit installation the installation will be the same.
Step two - boot into Ubuntu Live
The Ubuntu Desktop distribution is a so-called “live” distribution - an OS that boots from a laser disk or USB flash drive, with almost the same functionality as if it were installed on a computer. .
There are two ways to boot from a laser disk or USB flash drive. Either enter the BIOS settings and specify initial boot from a laser drive or USB device there, or when you turn on the computer, call boot menu. Almost all modern computers and laptops have this function - you press a special key on the keyboard and after a while a list of devices from which you can boot the OS opens. On computer motherboards Asus, this is the F8 key, but on Asus laptops it is the Esc or F2 key. For other manufacturers, these may be the Esc, F9, F10, F11, F12 keys.
Step three - find out how much free space is on your hard drive
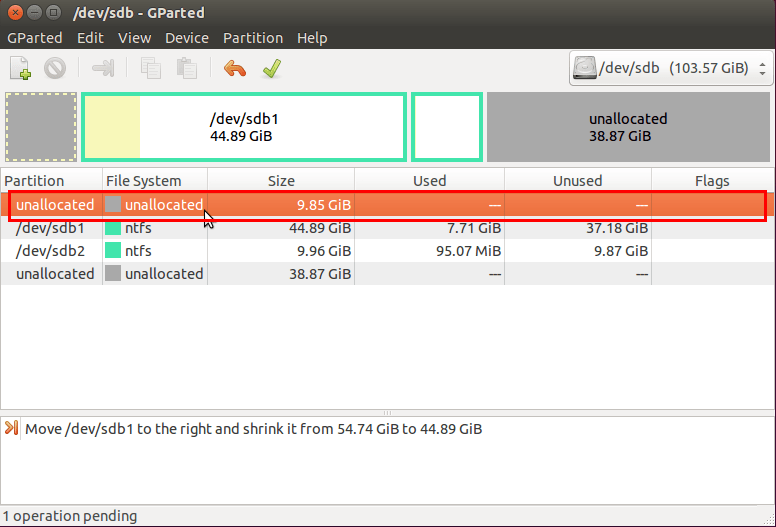
We launch GParted and there we look at the disk type, the number of partitions and the availability of free space:
In the example screenshot you can see the following:
- The disk partition type is traditional - MBR (msdos).
- Boot type is normal (not UEFI). The boot (first) partition of the disk has the NTFS file system.
- Windows 7 already uses 3 primary partitions. Despite the fact that the limit on primary partitions for such a layout is 4 partitions.
- The outermost (from the beginning of the disk) partition has a size of 340 GB and 125 GB are occupied on it. That is, you can free up more than 200 GB for Ubuntu.
There is a place to install Ubuntu, but since Ubuntu requires two partitions, and you can only create one more on this disk (limit of 4 partitions), you will have to create an extended partition and create partitions for Ubuntu in it.
In order to install Ubuntu on top of Windows, you need at least 14-15 GB of free space. Approximately 10 GB for Ubuntu and several gigabytes are needed for the swap partition - to more accurately determine the size of the swap partition, you need to find out the amount of RAM on the computer. The fact is that Ubuntu, in sleep mode, writes the contents of RAM to the swap partition.
Step four - creating partitions for Ubuntu 14.04
First, you need to reduce the size of the third partition on the disk to make room for Ubuntu. In this example, 25 GB are freed. After this, you need to create an extended partition in the unallocated area of the disk:


And the section for Ubuntu:

Here is the final disk layout:

And you can install Ubuntu.
Note. It is advisable to restart the computer and log into Windows - when Windows starts, a disk check will be performed because the disk size has been changed.
Step five - install Ubuntu 14.04
After Ubuntu Live boots (if you rebooted in step 4), you need to click the " Install Ubuntu 14.04 LTS" which will be on the Desktop:

In the first window you need to select Russian language:

The next window, you can specify the “Install MP3” option, and it is better not to enable the “Download updates” option:

In subsequent steps, the Ubuntu Installer will ask you for the installation type, you need to select “Other option”:


In it you need to select the ext4 section and specify the parameters for this section:


And click the "Install Now" button.
In the following windows, specify the remaining installation parameters:

Select your keyboard layout:

Specify the username and password with which you will log into Ubuntu:

This completes the collection of installation parameters. Now you just need to wait until the installer completes its work:

The entire installation process may take approximately 10-15 minutes. Of course, if there is a lot of free space on the hard drive and due to this, space is quickly redistributed for new partitions.
Once the installation is complete, you will be prompted to restart your computer. Next, when you turn on the computer, a menu will be displayed in which you can select the operating system to boot, either Ubuntu or Windows 7.
When Windows boots for the first time, a file system check will be launched on the Windows partition, this is due to the fact that the size of this partition has been changed. You just need to wait for Windows to perform this check.
Play mp3, wma, dvd video, avi, wmv in Ubuntu 14.04
All Ubuntu distributions out of the box do not support playback of proprietary audio and video formats, such as mp3, wma, dvd video, avi, wmv. This is because Canonical has strict rules regarding the license form software. All programs, from the company’s point of view, are divided into “good” and “bad”. Good programs are those distributed under the GNU GPL license or something very close to it in meaning, that is, free programs. Bad programs are those that have any licensing restrictions.
So, Canonical only includes “good” programs in its distribution kits. And the “bad” ones need to be installed independently. This does not mean that installing such programs constitutes any difficult process. If the program is in the Ubuntu repositories, it can be installed with a few mouse clicks. .
In particular, to play mp3, wma, dvd video, avi, wmv you need to install two “bad” packages: gstreamer-plugins-bad and gstreamer-plugins-ugly.
Possible problems
After the installation is complete, when you turn on the computer, there is no menu for selecting operating systems (Ubuntu or Windows). Ubuntu boots immediately. This makes it impossible to boot into Windows.
The problem is that the Ubuntu installer did not pick up the Windows partition. This problem can be solved simply. After loading Ubuntu, you need to open a terminal and run the command in it:
Why would someone need to install Ubuntu on a computer next to Windows 7? For example, to protect your favorite device from viruses while using the Internet and at the same time not to lose the functionality of your PC. Agree, even the best antiviruses written for Windows are not always able to resist the temptation to catch a Trojan, worm and other infection. At the same time, secure Linux is not yet as functional as Microsoft's operating system. What remains? That's right, alternately take advantage of both OSes.
Step #1: Preparing a system image
Before installing Ubuntu, of course, you should make sure that the distribution itself is available. In this case, there is no need to run to a friend across the city; you can download it from the official website, and absolutely free. The only thing you need to do is select the operating system version (32- or 64-bit):

After the distribution is downloaded to the computer, we remember where we saved it and move on to the next step.
Step No. 2: Burn the installation flash drive
It is worth noting that installing Ubuntu from Windows can be done either from a bootable USB flash drive or from a disk. Here, as they say, at will. However, given that all computers have a USB port, but no disk drive, it is more logical to consider the process of creating an installation flash drive. And then, lo and behold, we have dozens of options, or rather programs. If the recording will be carried out with Windows 7, and most likely it will be, the easiest way is to use the UNetbootin utility for this purpose.
How do we act? Download the program from the official website and run it on your computer. Note that she can independently search for the operating system needed to install. Therefore, if, after moving on to step No. 2, you still did not take care of downloading the Ubuntu distribution, trust UNetbootin to complete this task. To do this, in the program window that opens:

We proceed in the same way if the distribution kit was downloaded at step No. 1. The only difference is that instead of the Distribution tab, this time we select the Diskimage section. Then, using the “…” button, we find and mark the access address to the Ubuntu image previously downloaded to the computer.
In any case, after clicking the OK button, the UNetbootin utility will automatically write a bootable Linux flash drive. Fast, simple and without extra effort!
Step #3: Backup Data from Hard Drive
It seems that everyone knows that before installing a second system on a computer, you need to take care of backing up data from drive C, so why remind us of this, and even highlight it as a separate step? The fact is that perhaps everyone knows about this wonderful action, but only a few perform it. As there? Who doesn't take risks doesn't drink champagne? Of course, if the data on the computer is unimportant, then there’s no harm in taking the risk. However, given that Windows 7 provides backup without third party programs, it’s simply a sin not to use it.
What are we doing? Go to the “Start” menu, select the “Control Panel” tab, and in it – “Backup and Restore”. In the window that appears on the left, find the item “Create a system repair disk” and left-click on it:

Then insert a blank DVD-RW disc into the drive and click the “Create disc” button in the system window that appears:

After this, Windows 7 will automatically back up the information (create a system recovery disk).
Step #4: Start your computer from a flash drive
Have you completed the preparatory stage? Great! Now we restart the computer and when the system boots, go into the BIOS. To do this, depending on the PC manufacturer in Windows 7, you need to press the F1, Del or F2 button on the keyboard. After that, using the BIOS prompts, we find the First BOOT tab and by pressing F6 we put the USB-HDD item in first place:

Step #5: Install Ubuntu on PC
After the computer restarts from the installation flash drive, a welcome window will appear on the screen. In it, in the menu on the left, select the language that will be more convenient for us to use during installation, and click the “Install Ubuntu” button:

As a result, a new window “Preparing to install Ubuntu” will open. At this stage, the program will automatically check whether there is enough space on the C drive to load the new operating system, whether there is access to the Internet and whether the PC is connected to the electrical network. It is important to note here that:

Having selected the necessary settings, to continue the process of installing Ubuntu next to Windows 7, click the “Continue” button in this window. What do we need at the new stage? Define one of the installation types:

Taking a closer look at the program's offers, it would be logical to assume that we would need to select “Install Ubuntu next to Windows...”. However, we will act differently and opt for the “Other option” item. Why? Because in the first case, we will not have the opportunity to select the desired volume for Ubuntu on the hard drive. The system will be installed the way it wants, it will be impossible to influence it.
What are we doing? Click “Continue” and mark in the window that opens the section in which we will find a place for Ubuntu. We assume that we will need at least 10 GB of memory. How do we act? Click the appropriate section with the mouse, and then press the Change button:

As a result of such manipulations, the installation program will offer to select new parameters for the hard drive:
- size – subtract 10 Gb from the original size (for example, it was 32,210 Mb and became 22,000);
- type (use as) – leave it the same (it was ntfs, it remains the same);
- formatting – skip, otherwise we will delete it along with all Windows 7 data;
- mount point – do not change (save /windows).
After the settings are set, double-check them and click OK:


As a result, the “Free space” value will appear in the disk table. Click on it, click the “+” button next to the Change item and enter the following parameters:

After the new partition is added, we return to the disk table. Now, again, select “Free space” and press the “+” button again. At this stage we make the following settings:

By pressing the OK button, we return to the partition table and put a checkmark next to Ext4 in the “Form” (format) column:

Now click the “Install Now” button and the program begins partitioning and copying system files Ubuntu. At this time we move on to selecting additional settings:

As a result, after clicking the “Continue” button, the Ubuntu installation process will be displayed:

We just have to wait until the OS is installed on the computer next to Windows 7. When the installation is complete, we reboot and pull out the flash drive. If all the steps were completed correctly, when you start the PC again, a bootloader window will appear with approximately the following content:

All that remains is to select Ubuntu from the list and wait until the OS boots onto the PC and is ready for use. It's simple!
If you have decided to install Ubuntu on your computer and are about to do it for the first time, or have done it before, but are not entirely confident in your abilities, this article will help you.
Although from the outside, installing Ubuntu (and not only) may seem like something complicated and incomprehensible, in reality it is not so. It's not more complicated. The most difficult things for a beginner are mainly just changing the boot order of the computer and partitioning the hard drive. The rest is mostly a matter of clicking Continue.
The article will discuss installing Ubuntu 18.04 next to Windows 10 on a computer in which the basic I/O system is BIOS.
To ensure that installing Ubuntu is not a simple repetition of instructions for you, but a conscious action, in the article, in some places, I will make digressions for clarification or reference. And if you're ready, let's get started!
Installing Ubuntu 18.04: Preparation
Before installing Ubuntu, you first need to download the ".iso" system image and burn it to a disk or . To do this, go to the Ubuntu download page on the official website and select the distribution version.
Caninical releases new version OS every six months - in April and October, this gives the version number: year.month. That is: Ubuntu 18.04 is the April 2018 release. In addition, each release has a code name consisting of two words: the name of the animal and its quality, which begin with the same letter. For example, the codename of the future Ubuntu 18.10 is Cosmic Cuttlefish.
Every two years, the April release of Ubuntu receives a long period of support, abbreviated LTS (Long Term Support). The LTS release support period is 5 years. Other versions of Ubuntu are supported for 9 months. In LTS releases, developers try not to include new unfinished components so that the version is as stable as possible. Therefore, all important innovations receive regular releases and then it is finalized to the new LTS. So, non-LTS releases can, to some extent, be called experimental.
Due to the fact that there are no fundamental differences between Ubuntu 18.04 and beta 18.10, and the former is an LTS release, I would recommend installing Ubuntu 18.04. However, if you want to use the latest Canonical developments, you can choose Ubuntu 18.10, but keep in mind that this is not yet a stable version.
When you have made your choice, click “Download”. You will be redirected to the donation page. If you don't want to thank the developers for their work, just don't do anything - the download will start automatically. Also on the download page you can see a link to “Alternative downloads”, where old versions of Ubuntu are available, as well as downloading via torrent, etc.
After downloading the image, it will need to be written to a disk or flash drive. As a result, we will get “Live CD” or “LiveUSB” depending on which media you choose.
LiveCD is an operating system that boots from removable media and does not require installation on a disk. That is, the disk that you burn can be used not only for installing Ubuntu, but also for work if you are not able to boot the OS from your hard drive. Live systems get their name from the type of media on which they are installed: CD - LiveCD, DVD - LiveDVD, flash drive - LiveUSB etc.
When the LiveCD is ready, the only thing left is to boot the computer from the CD. Accordingly, if you use LiveUSB - USB.
Installing Ubuntu 18.04: Setting up the BIOS
Changing the boot priority is done in the BIOS. Unfortunately, due to the fact that there are many versions of it and different motherboards use their own, it is impossible to describe this procedure for each computer.
In general terms, when the computer boots, in the first few seconds, you need to press a special key or key combination, often F2, F10, Esc, Del, in order to open the BIOS settings. Often, during loading, a message is displayed at the bottom of the screen indicating what to click. Next you need to find the Boot section and there is a list of available boot options. The required item must be put in first place and the settings saved. After this you can boot.
Here's an example of changing the boot priority of one of my laptops:
As soon as the laptop starts to boot, the manufacturer's logo appears for two seconds and the line appears in the lower left corner: Press F2 to enter Setup. After pressing F2, the BIOS settings open. There are five tabs at the top: Information, Main, Security, Boot, Exit. Using the left-right keys, go to the Boot tab. Here is the list Boot priority order and available options: IDE, HDD, CD/DVD, PCI LAN, USB HDD, USB CDROM.
In order for the laptop to boot from the CD, you need to use the up and down keys to go to the CD/DVD item and use the F6 key to move it to the first place. After that, press F10 to save the settings and exit the BIOS. A pop-up window will appear, click to confirm Enter. The laptop will start to boot.
Once the BIOS is configured, you can begin installing Ubuntu 18.04 next to Windows 10. Start the computer.
Installing Ubuntu 18.04: Installation
Ubuntu installer
An icon will appear at the bottom of the screen:

Press any key on the keyboard to select the installer language and press “Enter”.

The bootloader menu will appear:

We need to install Ubuntu, so we select the appropriate second item. The download will begin:

After some time, the system will boot and the installer window will open:

He will immediately offer to choose the language of the future system. Select Russian and click “Continue”.

Select and click “Continue”.
Then they offer to select a set of software - standard or minimal, installation of updates that have been released since the release of Ubuntu and codecs that are not included in the distribution by default due to licensing agreements:

Choose the software that suits you best: get a standard set (players, office package, games) and then remove what you don’t need, or choose the minimum set and install everything you need yourself. I'll leave the default selection. Also, if you have an Internet connection, you can check the installation of updates and codecs. Click “Continue”.
The next step is to select your Ubuntu installation type. The installer offers us three options:

- Install Ubuntu next to Windows 10— the program will select one of the partitions on the hard drive and prompt us to select the amount of memory for Ubuntu. After this, one partition will be created in the allocated space, on which the OS will be installed. In this case, Windows and all files will be saved. This option may be suitable for you if you do not want to go through the hassle of manually marking disks. But placing the system and user files on the same partition is not good. Therefore, this option is not recommended.
- Erase disk and install Ubuntu- everything on the hard drive will be deleted. One partition will also be created and the system will be installed on it. It is also better not to use this option.
- Another variant— we ourselves will need to create partitions for Ubuntu. Most difficult option of the three proposed, but also the best, since we ourselves can indicate what needs to be installed and where. We choose him. Click Continue.
Disk partitioning
The markup program will start. We see that now the entire disk is divided into three ntfs partition, these are Windows volumes:

- sda1- a hidden section that was created automatically during Windows installations;
- sda2— the partition on which Windows itself is installed (drive C);
- sda3— user files are located here (drive D);
For Ubuntu we will create two partitions:
- / - root. It will host Ubuntu itself;
- home- home directory. It will store your files: images, music, videos, etc. User program settings will also be stored here.
Previously, it was recommended to create a swap partition; it was used when the computer did not have enough RAM. But in Ubuntu 18.04, instead of a swap partition, a swap file is used by default, so we will not create a swap partition.
First you need to make room for future partitions. We will do this by reducing the size drive D.
Before any manipulations with the hard drive, make a copy of important data to another medium so that in case of errors you do not lose it.
Select the sda3 section and click the “Change” button.

The “Edit Partition” window will open:

- Size— I want to reduce this partition to 40GB. The rest of the space will be given to Ubuntu. Please note that the size of disk D is entered here, not the size that we want to free.
- Use as— NTFS journaled file system: since this is a Windows partition, we leave its native file system.
After selecting the file system, the format item became active and the “Mount point” field appeared.

- Format partition- we don’t celebrate. Otherwise, all data from this partition will be lost.
- Mount point- must be /windows but now it is not in the drop-down list. This is the folder where this volume will be mounted in Ubuntu. For now we leave the field empty
Click OK.
A warning window will appear, which means that if you continue, all changes will be made without the possibility of cancellation:

Click “Continue” and we see that 44GB of free space has appeared:

Once again, select the sda3 partition and click “Change”. In the window that opens, in the “Mount point” field, now select /windows and click “OK”:

After this, the corresponding label will appear next to the section:

Let's create a root partition. Select an empty space and click the plus sign below it:

The partition creation dialog will appear:

- Size— for Ubuntu you need about 5GB, plus the programs you installed and the swap file will be added to this. The result will be somewhere around 15GB. To be on the safe side, if you have the option, I would recommend 20GB.
- New partition type- logical. Due to limitations of the partition table, which stores disk partition information, more than 4 primary partitions cannot be created on a hard disk. You can create many logical ones.
- — the beginning of this space. So that the partition is closer to the beginning of the hard drive and not to the end.
- Use as— ext4 journaled file system. Ubuntu can work with file files Windows system, but since this is still not a native Linux FS, it is better to choose something more suitable. On this moment this is ext4.
- Mount point- /. A slash denotes the root partition.
Click OK. The operation will be completed.
We follow the same steps to create a home directory and set the following settings:

- Size— we give the remaining space to the home directory.
- New partition type- logical.
- Location of the new section— the beginning of this space.
- Use as— ext4 journaled file system.
- Mount point- /home.
Click OK. As a result, we ended up with five sections.

This completes the disk partitioning and you can continue with the installation. Click Install now.
A window will appear to confirm the changes:

Click “Continue” and the files will begin copying. At this time you will need to provide additional information.
Timezone:

And user details:

pay attention to Username, it's your login. Unlike your name, it must be written in Latin letters.
« your name"can also be written in Cyrillic, but since you cannot change the layout during installation, we write it in Latin letters.
You can also now set up automatic login if you don’t want to enter your credentials every time you log in. When you have filled out all the fields, click “Continue”.
This completes the Ubuntu setup; all that remains is to wait until all the files are copied and installed on the hard drive. While you wait, we will be shown a small presentation of the new Ubuntu.


Once the installation of Ubuntu 18.04 is complete, a window will appear asking you to restart your computer.

We agree.
This completes the installation of Ubuntu 18.04 next to Windows. When the computer turns off, the CD drive will open. Remove the disc, close the drive and press Enter. The computer will begin to reboot. Go into the BIOS and put booting from the hard drive back to first, save the settings and boot into Ubuntu.
Let's say you read several articles on the Internet and became interested in the free Linux operating system. Perhaps you even installed it on your virtual machine or booted into Live mode and tried out how everything looks and works. You liked it, and now you want to install it on your computer and start using it. But at the same time, you don’t want to lose your already installed Windows so that in case of an unforeseen situation you can return to a fully working system, and your favorite games and necessary programs will always be at hand. It is possible to install Linux and Windows 10 on one computer. At one time, for me, as for many other users, this was the ideal option.
In this guide, we'll look at how to install Linux alongside Windows 10. I say Windows 10 because it's the newest operating system from Microsoft, but these instructions will also work for older versions like Windwos 7, 8, and 8.1.
I'm guessing you already have installed Windows, you have found and decided from which disk to allocate some space for Linux, but you don’t know how to do it correctly. Here you will get a detailed answer to this question. Let's touch on another important topic - UEFI. This technology is used on all new Windows laptops, and many users are interested in how to install Linux on UEFI and what problems may arise.
To install the Linux operating system next to Windows 10, you will need to create several additional disk partitions. The minimum number is three sections. It is not customary to install Linux on one partition like Windows, although this option is possible. Linux is so flexible that it allows you to place the system, user files and settings on different partitions. This is very beneficial during reinstallation. You reinstall the system in the system partition, and all your files on the desktop and work environment settings will remain in place.
These are the three sections:
- Systemic;
- Home;
- Swap partition.
The minimum volume requirements for a system partition in different distributions vary from seven to twenty Gigabytes. But this is enough to install the system itself and several additional programs. If you are going to use a lot of programs and games, especially if they take up a lot of space, you need to take a couple of tens of Gigabytes in reserve. I recommend using under system Linux partition the same as for Windows C drive, 30-40 Gigabytes.
The swap partition is used when the system does not have enough RAM. At a certain percentage of fullness, Linux gradually begins to dump unused data into this file. Therefore, for this section, a volume half as large as the size of your RAM is suitable. But if you plan to use sleep mode or hibernation, then you need to allocate an amount of disk space equal to the size of the RAM for the swap partition, because in these modes the entire contents of the computer's RAM are transferred to disk. The home section is the section with your files, movies, music, downloads. Estimate how much you need.
Preparing a Disk in Windows
To install Linux next to Windows 10 already in use, you will need to “cut off” space from the system disk. Therefore, before taking decisive action, it is important to create a backup copy of the system or at least important files. If everything goes well, nothing bad will happen to either the files or the system, but due to some failure, such as a power outage, the file system may be damaged. You yourself, through inattention, can do something wrong and delete something that is not necessary.
Therefore, if you work with the system disk, copy important files to external media, and, if possible, create a backup copy of the operating system using the appropriate control panel item:

When working with a non-system partition, for example, D, E, F etc., just copy the files from there.
Now we proceed directly to preparing the disk for installing Windows 10 and Linux. The easiest way to do this is using the standard Windows Disk Management utility. Right-click on the " This computer"on the desktop and open the item" Control":


Here at the bottom of the window we see two drives: C (system) and D (regular). I will give an example of how to resize drive D. For drive C, all steps are similar.
Right-click on the desired drive and select the option Shrink Volume:

A window like this will open in which you need to enter the size of the volume to be created in the field size of compressible space:

Please note that you cannot specify a size greater than the amount of free disk space. So make room first if you haven't already. Click on the button compress. After this, unallocated space will appear, from which you can create the necessary partitions:

That's all. Now you have room for Linux installations next to Windows 10. I see no point in performing further disk partitioning in the Windows utility, since we have already done all the dangerous operations that could damage the system, and it is best to configure partitions for Linux using Linux tools.
Preparing a Disk in Linux
This is not the next step in installing Linux along with Windows 10. This is an alternative disk partitioning option without using Windows. If for some reason you do not want to use the standard Windows utility to allocate the required space, this can also be done using any LiveCD Linux distribution with the Gparted disk management program preinstalled. For example, the same Ubuntu.

Boot from the Ubuntu disk, in the Dash search type Gparted:

The following program window for disk management in Linux will open:

It is important to note here that disk partitions in Linux are named differently than in Windows. Here, drives are simply addresses of files in the dev virtual filesystem. Later you will understand what this is, but for now the only important thing is that the name of each partition begins with /dev/sd. Next comes the letter indicating the physical disk (sda, sdb, sdc, sdd, and so on). Behind it is a number that indicates the partition number on the disk, for example: sda1, sda2.
In the utility window, in addition to the name of the disk partition, we can see the file system, size and free space on the disk. Now, based on the size and file system, we can understand which disk our system is located on.
In my example, /dev/sdb1 is the C drive in Windows, and /dev/sdb2 is the D drive. We will do the same as in the previous example. Let's reduce the size of the /dev/sdb2 (D) partition to 10 Gigabytes so that we can install Linux on Windows 10 using the freed up space. To do this, right-click on the partition and select Resize/Move:

In the window that opens, you can enter the desired size manually in the field New size or use the slider:

Then click the button Resize/Move.

As you can see, free space has appeared, but there are no real changes on the disk yet. In order to burn everything to disk, click the green checkmark, or in the menu Edit select item Apply All Operations:

The file system resizing process may take a little time:
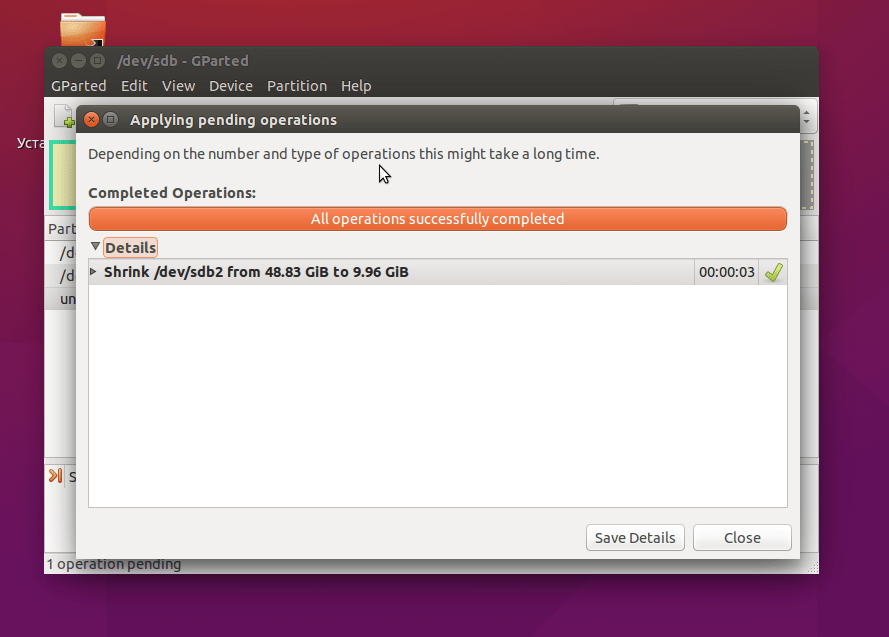
Now you can see that the /dev/sdb2 partition has shrunk and there is free space:
For the system partition, the operations are the same, only there is one note: do not touch the beginning of the partition. You can safely reduce the size of a partition by adding free space after it, but don't try to do it before it, like this:
There is no need to do this, otherwise the Windows bootloader will be damaged; it is very easy to restore, but I think there is no need for you to solve these problems at the very beginning of your acquaintance with Linux.
We will not create partitions for Linux here either; it is better to do all this during installation, using a utility specially designed for this.
Installing Linux next to Windows 10
I will not consider in detail here how to install Linux; all this has already been discussed in detail in my articles separately for different distributions. Let's look at just a few aspects of disk layout. Let's take Ubuntu as the most popular OS for beginners, but in other distributions everything is almost the same.
At the stage of choosing a marking method, I recommend choosing the manual option. Because this way you will better understand how to install the system:

Here, from the previously freed space, you create those sections that we talked about at the very beginning of the article. For the root partition the mount point must be /, for the home partition - /home, and for the swap partition the mount point must not be specified.
Installing Linux next to Windows 10 UEFI
All modern laptops released with Windows 8, 8.1, 10 use UEFI technology. This is a new progressive technology that has replaced the outdated BIOS. The first important and most noticeable change is the use of a GPT partition table instead of the legacy MBR, as well as the creation of a separate disk partition for operating system bootloaders. Many users are afraid that UEFI will make it more difficult to install Linux with Windows 10 on their laptop. And in vain - in most cases there is nothing complicated. If you already have Windows installed, then most likely the efi partition has already been created, and during disk partitioning you just need to select it to install the bootloader. The efi partition is usually created with the fat32 file system and takes up about 30 Megabytes of memory:

If you have a clean hard drive, you need to create a GPT partition table. This can be done using the same Gparted by opening the menu Devices ->Create Partition Table:


Then we specify this partition during the installation of Linux along with windows 10; for it you need to specify the mount point /boot/EFI. That's all the difficulties with installation in UEFI. In general, installation in UEFI is supported by all distributions running in Grub2.
Completing the installation
Many new users are interested in: “How can I boot my Windows later?” Don't worry, Grub will automatically find the Windows boot loader and offer you a menu where you can select your operating system before starting your computer:

This way, dual booting Windows 10 and Linux will be set up automatically.
If something doesn't go according to plan, although it's unlikely to happen, everything is very easy to adjust. So, if done correctly, you will definitely have access to your Windows after installing Linux.
conclusions
Today we looked at how to install Linux on Windows 10. We figured out how to partition, how to select partitions, and what to do if your laptop uses UEFI. There is no point in talking about installing any specific Linux distribution along with Windows 10, since, firstly, all the steps are similar, and, secondly, you can find detailed instructions in the relevant articles. I would also like to note: for a comfortable Windows operation 10 with Linux on the same computer, you need to disable Windows FastBoot, otherwise you won't be able to . If you have any questions, ask in the comments!