How to attach a wooden house to a tree. How to build a tree house for kids
A tree house is every child's dream, but not every one of us understands how to make it come true. That is why we have prepared detailed instructions structures, with the characteristics of materials and the correct sequence of construction.
A tree house is a complex building for any summer resident, and the reason for this is some of its features. Firstly, a base that is not installed on a hard surface, but remains in the air, suspended. Secondly, the design device, which is unusual and must comply not only with safety and reliability standards, but also be carefully thought out in terms of construction around one or more vertical supports.
Please do not undertake this matter if you:
- Unprepared for a difficult task;
- Not confident in their own abilities;
- Do not have experience in construction;
- Not ready to work with drawings and exact dimensions;
- Worried about costs and trying to save on parts.

Each such argument is a limitation, because failure to comply with important requirements for the safety and quality of the building can lead to unpleasant consequences!!!
If you are full of energy and desire, have repeatedly worked with wood, metal, frame structures, or were simply engaged in construction at the dacha (gazebos, outdoor showers, fences, etc.), you can begin construction, but only by adhering to the work plan.
We draw up a construction plan
At first glance, this is a simple plan and estimate, but it is necessary to take into account all the design features, be sure to adhere to the choice of high-quality materials and fasteners, blocking technologies on vertical bases, and so on. But, by and large, if you are building a house that is not heavy and not large, for the games of one or two children, and even on several supports or on the trunk of an old and powerful tree, then you don’t have to resort to cosmic calculations. All that will be necessary in this situation is to try to do everything correctly, with accurate calculations, not forgetting that it will be your children who will play at the top!

When drawing up a plan, it is necessary to take into account the location, the density of the soil, and also determine in advance the tree or several trees on which the house will be built.
Choosing a tree and making preparations
Choosing a tree is very simple. It should have a thick and powerful trunk, not old or dilapidated, preferably straight.
The tree will need to be prepared for building a house on it. To do this, all the growth that is in the way below is removed, branches at a height of several meters are cut off so that you get one or more trunks, which will become the foundation of your structure.

Choosing a tool for the job
They say that a good craftsman can easily cope with construction with only one axe, but we will not tempt fate and complicate the task, because quality can be obtained if you have good tool. That's why we choose professional tools for working with wood. This should be a hammer and mallet, a hacksaw and a circular saw, a grinder and a drill.
As accessories and consumables, we need to prepare a water level, a tape measure, a pencil and paper, bolts and nuts, screws and ropes, corners and special fasteners.
In addition, we will need materials to protect the building and its decoration - impregnations, varnishes, paints, as well as tools for work - brushes, containers, etc.

Do not forget about ensuring comfort and your own safety; use plastic goggles, gloves, a respirator, and thick work clothes.
Building the base of the house
Having chosen a place and wood for the structure, having purchased all the tools and consumables, materials and protective equipment, we begin the difficult work.
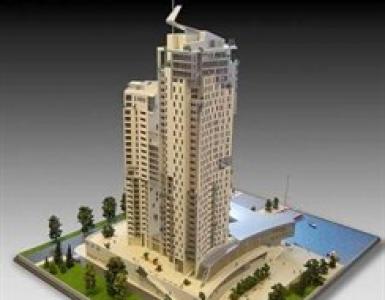
First, the base of the tree house should look something like our photo.

As you can see, this is a solid structure that rests on a tree trunk and supports. Naturally, everything will be simpler for you, but you should understand that a correct and reliable foundation design looks exactly like this.
To build this type of platform, it is necessary to secure supports around the tree, which must be dug in and concreted. To increase stability, each support can be equipped with an armored belt, which will create serious interference with vibrations and swinging of the supports.
The installation depth of the supports is at least 100-120 cm. The diameter of each support is 15-20 cm if we are talking about a log, and approximately 15x20 cm if we are talking about a beam.
Remember that for the durability of such supports they should be pre-treated with drying oil and varnish, and the part that goes into the ground with grease, oil waste, and other similar materials. In addition, during concreting, spacers should be installed for the supports so that the supports do not move while the mortar is drying.
Installing the platform on supports
The platform must be strictly horizontal and with correct weight distribution so that all supports and trunks of a tree or several trees bear the same weight. It is also worth considering the time of subsequent equipment of the playhouse so that redistribution does not happen in the wrong direction.
To build the platform, choose high-quality material, but not too bulky or heavy. A beam of 5x10 cm or 6x10 cm will be enough to produce the frame.
One carrier is immediately fixed, horizontally, and always with three connection points to avoid deflection in the middle. To do this, the beam is attached to two supports, and its middle part is fixed to the tree trunk in the middle.

Fastening is carried out using bolts that pass through the contacting parts. You should not use screws or self-tapping screws here, because the structure should be strong.

We install all the load-bearing elements sequentially, as in the first example, and be sure to maintain the levels and quality of the fastenings.
If the house is built only on trunks, without additional supports, then special spacers are installed under the extreme parts of the supporting platform, which provide stability and additional load-bearing capacity.

These spacers are installed on through bolts and are clamped well, but be sure to take into account the possible growth of the tree trunk in the near future. To do this, materials can be placed on each side of the fastening that will create ultimate strength only for a certain time, for example, several years. It could even be burlap, folded into 4 or 8. It will immediately give the desired density, but after a couple of years it will sag under pressure or grow into the bark. Thus, the tightness of the fastening will not be lost.

Base for flooring
Load-bearing beams and supports are just the beginning of the structure; then we build the base for the flooring. It’s much easier with it, because there is somewhere to lay the transverse load-bearing elements - directly on the frame.
The frame may look something like the photo below. It must be durable and withstand heavy weight, ensuring safety.

Do not forget that even the transverse bases for the flooring must be well secured. Here you should use special plates or a metal corner, which will prevent wooden materials from swaying and spoiling the stability of the structure.

In addition, you can always purchase specialized parts that are designed for the construction of wooden buildings. They look like this:

Laying the floor
When the base is ready, well inspected and completely satisfactory, you can move on to laying the floor. Here it is worth using edged and sanded boards, which should be pre-sized and cut.


Now we are drawing up a plan for the flooring. We need it for the reason that in the middle we have at least one tree trunk that will need to be walked around. By the way, this is why it is necessary to create additional tree-trunk platforms on which to rely in such a case.
Using professional tools and preliminary markings, we cut boards for the flooring in the house. We check the finished material again and install it in its rightful place, securing it sequentially, board by board, with self-tapping screws.

Construction of walls, railings and stops
The platform for construction is completely ready, and now we just have to limit the space inside the house, and this can be done with the help of strong walls.
To build them, we need to create foundations around the perimeter of the platform. This can be done by attaching to the support beams or even to the bases of the floor platform. The main thing is to tighten the walls along the entire outline of the house, thereby creating the strength of the walls.
The production of limiters and walls will require us to spend additional timber and boards, but here we can already use thinner material.
Remember that the safety of children depends on the seriousness of the approach to the construction of walls and restraints!!!
Roof structure
Like any house, ours must be covered so that the cheerful children are not taken by surprise by the cool rain. The construction of the roof is quite simple. Often, this is an ordinary and inexpensive canopy or a special lightweight roof made of polycarbonate or ondulin. But a frame is also needed for it. It is installed on the top of the walls, which we have already built and tightened, and is also attached to tree branches up the trunk.
As a result, you can get a similar foundation for the roof:

Building a staircase
Here is one of the popular options for stairs for such structures. Of course, it can be done differently, sometimes even, but it’s up to you to choose!
The last thing you should think about is the appearance and practicality of the stairs, because initially only safety. Of course, if the treehouse is located at a very low altitude, then the staircase can be decorative or even exclusive, but for higher houses it is worth attaching railings to the staircase.

Finishing, protection and decor
Now the finishing and sewing is done, for which we use all the materials described above. It is also worth using wood preservatives to prevent insects or weather conditions from ruining your work in just a few years.
Afterwards, decorate the tree house, place inside children's furniture, pillows and blankets, a table for tea parties and other accessories necessary for games and relaxation.
Building a tree house (video)
Building a treehouse playhouse is difficult, but only in compliance with all rules and safety requirements. Otherwise, this is an almost standard building, which we often encounter at our own dacha.
Reviews and comments
Vera 02/25/2014
Without a doubt, all children dream of a tree house. This is their refuge, where they can play, share their secrets, in general, it’s like their separate, magical little world. It’s a pity that I didn’t have such a house when I was a child, but I would really like to build something similar for my children. Perhaps we can do this at the dacha, at least we will try.
Natalya 03/04/2014
Our kids have pretty much everything they want now, and if my three-year-old asks for a treehouse in a couple of years, I'll make sure he has one. It’s just scary because of the height, you never know. I wonder what height the author proposes to put the house at, or does it depend on the crown of the tree? And how durable is this structure, does it need to be painted or varnished so that it does not swell from moisture?
Vladimir 06/16/2014
I would also be happy to build such a house for my daughter; I also have suitable trees on my summer cottage. I’m still afraid to build because my daughter is only 4 years old; she’ll have to be nearby all the time. I'll probably take it next year. I would like to correct only one thing in this design. I don't want to attach the structure to a tree trunk. Cutting down a branch is one thing, but screwing a fastener into the trunk is another. I don’t want to destroy the trees, I’ll think about something without this.
Victor 04/29/2015
I had a house like this when I was a child. It is great. I want to build one for my children, but my wife won’t allow it - she’s afraid. So we are still arguing about this issue. In the meantime, we just have a mini cold room on our site.
Denis 12/21/2015
Well, you definitely shouldn’t do it too high; a 5-year-old child can easily fall. A couple of meters is enough for your son, and you have to do it thoroughly. It would be nice to put a net underneath for insurance. The house, of course, needs to be treated with special anti-rotting agents and painted. Then he will delight your little son longer!
I remember making similar designs with friends as a child. I was already about 12 years old. At this age, it is quite possible to make a house at a height of 4-6 meters. Teenagers are more aware of the danger, and five-year-old children are not yet so strong and dexterous.
Tatyana 07/16/2017
I love raspberry and strawberry compotes. Get it cold winter A piece of summer from the cellar is an indescribable pleasure! Sometimes I replace sugar with honey if I want the compote to acquire medicinal anti-cold properties. If I want something original, I dilute the raspberry compote with a cold decoction of ginger and mint - the taste is simply magical! If you haven’t tried it, definitely try it!
Add a commentWarm days force us to spend our leisure time outdoors. It is worth taking care of the children and creating a great play space in the garden. A tree house is a great way to make outdoor play attractive. Building a children's hut is not very difficult and will bring a lot of pleasure to the builder himself. The benefits are guaranteed provided that the building is safe and reliable. We will describe in detail below how to build a tree house for children with your own hands.
What will you need?
It is important to know how to make a children's playhouse so that the design guarantees safe children's play. You need to prepare drawings, house design in advance, prepare necessary materials. Those who like to make things with their own hands will cope with the task, enjoying the work.
You can significantly reduce the cost of purchasing the necessary building structural elements by using pallets and scrap materials left over from construction and renovation of a summer house.
You will need:
- drill,
- jigsaw,
- saw,
- accessories – screws, hammer, scoop, ladder, safety glasses;
- wooden beams, beams, boards, corrugated sheets, OSB boards.
The boards chosen are durable and impregnated - they will last for several years. The use of natural building material will ensure safety, durability, the design will harmoniously fit into environment.
Interesting option– building a house from pallets. Pallets are cheap, they are sold in large stores and warehouses. Used pallets require careful cleaning, sanding, and impregnation.

Choosing the right tree
It is extremely important to do right choice wood for the base of the house on which the structure is built. If the tree is large and spreading, you can place the structure between the branches at any height.
Which tree is suitable?
The tree must meet the following requirements:

The trees most suitable as the foundation of houses are the following:
- oak is a durable wood, famous for its spreading horizontal branches;
- beech – durable, strong;
- walnut is the owner of durable wood;
- Apple tree;
- poplar with branching branches;
- Linden;
- maple.
You cannot choose flexible trees, such as willow.
Choosing the right type of tree is not enough - to build a house with an area of 9 m² (3 × 3 m), a trunk diameter of at least 30 centimeters is required.
Calculation example. To install a house with an area of 9 sq.m., you will need a tree with a trunk circumference of at least 95 cm:
90/3.14=30 centimeters

If the main branches of the tree are located in the shape of the letter “V”, the floor should be located just above the junction of the main branches of the crown.

The house must have a strong enough foundation to make play completely safe. During the construction process it is important not to damage the tree, although sometimes the structure requires pruning of some branches. Professional pruning will not harm the tree or stop further development. It is not recommended to place the house too high. It is necessary to ensure free ascent and descent without the risk of falling.
If there is no suitable tree
If children ask to build a house, but there is no suitable tree in the garden with the proper shape and load-bearing capacity, you can build a house on a stump or log. The structure, after construction, will take the shape of Baba Yaga’s hut, which will certainly attract demanding kids.
You need to purchase a solid wooden beam, a healthy tree stump, which is buried in the ground to a depth sufficient for stability. A concrete mixture should be poured into the ground to ensure complete safety of the structure.


What to build a house from?
Before starting work, you need to prepare the necessary materials:
- thick boards, possibly pallets;
- wooden supports to support the house and attach it to the ground;
- the supports need to be concreted in the ground - you will need cement and sand;
- regardless of whether the house is located entirely on a tree trunk or partially resting on the trunk, additional brackets will be needed;
- fastening elements: screws, bolts, pegs;
- you may need ropes when building stairs and railings;
- the frame is made from any wood, usually boards from pine (the cheapest), beech, and oak are used;
- impregnation will help make the wood resistant to moisture and frost.

Construction of a house
Drawing up a plan, diagram
Assembling the structure requires precision and strength calculations. You should not place the house high; strong wind will become a serious obstacle when the branches begin to sway, shaking the structure.
A good plan is the key to success. First you need to make a drawing of the house, taking into account the space for the growing tree and the location of the branches. This implies the need to leave free space in some places so that the built object does not collapse under the pressure of the growing plant. It is important to familiarize yourself with the characteristics of the wood species. It is necessary to leave the holes 5-8 cm wider for further growth of the tree trunk.
When designing a children's house, plan its dimensions. It is convenient if the floor has a size of at least 2.5 × 2.5 meters. Such proportions guarantee fun, placement of some furniture, toys, leaving space for children, without overly burdening the tree. At the design stage, the location of the door is chosen where branches do not grow to limit the entrance. It is necessary to place the windows on the sunny side, ensuring daylight house interior.

Floor designation, choice of installation method
First you need to install supports and build a floor platform for the house.
There are 3 ways to install the floor platform:
- The first method is to install support beams on a tree trunk. The method is often used, although it damages the tree.
- The second method is a floating suspended platform. The house is mounted suspended on chains, ropes suspended from high, strong branches. Installation of a suspended platform can be done on a tall tree with strong branches; the house should be light.
- The third method is the most environmentally friendly - the supports are buried, concreted into the ground, and not attached to the tree trunk. For support, a wooden beam with a cross-sectional dimension of more than 10 centimeters is used. It is necessary to choose reliable brackets. The timber is buried to a depth of 8-10 centimeters, covered with gravel, and the timber is concreted into the ground, strengthening the structure. Usually 4 supports are used; in the case of a large house, 5-6 beams will be required.

Home construction
Thick boards are used to build the floor platform, thin boards and OSB boards are used for the walls.
Floor installation
The floor platform must be additionally reinforced with beams attached to the side. The number of beams and distance are adapted to the size of the house and expected loads. To make the top layer of the floor you can use:
- traditional wooden planks;
- OSB board.
OSB board is more durable and resistant to adverse weather conditions.
We proceed to install two very strong beams that support the structure between the branches. The floor is mounted on their basis.

We complete the structural frame of the house by attaching the elements with screws or using ready-made metal connectors to attach the structural elements.

Reinforce the structure with two supports on each side to ensure safety.

The boards of the future floor are laid out in 2 ways:
- parallel between the branches - the tree is severely damaged by the screws being screwed in;
- on a wooden frame to which the boards are attached - the branches are almost not injured and will not dry out.


Boards cannot be laid without support for spans longer than 1.5 meters. For strength from below, you need to lay the beams in a perpendicular direction.

When the frame and brackets are fully assembled, it is worth trimming the ends of the pillars protruding above the floor so that they do not interfere.

House support diagram.


Wall installation
When the floor of the house is ready, they begin to create side structures. To build the side walls of the house, it is better to use wooden beams along the edges; the middle can be filled with any material, often used:
- OSB boards, characterized by exceptional strength and resistance to adverse weather conditions;
- wooden boards;
- plywood boards;
- siding;
- in a light summer version, the walls are made of canvas or camouflage mesh.
When building the side walls of the house, you need to leave openings for windows and doors. The height of the house should correspond to the height of the child plus 20-30 centimeters, because children grow quickly. A children's playhouse must guarantee safety and comfort.
Individual elements are connected with self-tapping screws; experts especially recommend CSA screws and CNA rough nails. You cannot skimp on fastening elements; you need to ensure maximum strength, reliability, and stability of the structure.
Roof
The roof structure is attached directly to the side walls. Roofs are made flat and gable. Gables are better suited for winter conditions when snow falls. A thick layer of snow can overload the structure.
The following is used as a roof:
- boards,
- corrugated sheets,
- bitumen slabs.
The roof can be made of sheet metal, boards and covered with resin paper. Interesting accents - thatched roof, wood chipboard roofing. Creating such a roof requires professional excellence, significantly increases the cost of building a house.
A thick polyethylene waterproof film attached to the frame, to which the roof boards are attached, will help ensure 100% waterproofness. You can treat the roof boards with resin, protecting them from moisture and destruction.


Entrance, staircase
Since the structure is located at a certain height above the ground, it is necessary to ensure safety and comfort during ascent and descent.
- Ladder. In the simplest version, a simple ladder is used; the solution poses a risk of falling, especially for small children. A minute of inattention and the ladder can tilt and stagger. It is advisable to attach the ladder to a tree.
- Do-it-yourself wooden staircase to the house. Some people build their own stairs from cross bars and two identical boards with cross-sectional dimensions of 5 × 10 centimeters. The planks are attached to wooden pegs and additionally secured with nails. It is important to adapt the load capacity of the ladder to the weight of the people.
- A rope ladder is an interesting solution for older children and will help the child develop climbing skills. When building a rope ladder, you should use special strong ropes designed for mountaineering.
- Constructing a solid, self-supporting wooden staircase on the side of a platform is quite a challenging task. Choosing this option, you must remember about the safe angle of inclination of the stairs; too steep a staircase is dangerous. Stairs are constructed from boards 50 × 10 mm and steps 50 × 12 mm. The size of the stairs is selected for specific conditions. Properly cut steps should be attached to the boards using screws and glue at regular intervals. A balustrade or railing is required to increase security.

A stable staircase with safety railings is the most optimal solution for very young children who have problems with coordination of movements.


Impregnation and painting of wood
A children's house in the country is an investment for many years, so it is worth thinking about proper impregnation of the wood. Before treating the boards with a suitable preparation, you should sand the surface, remove knots and lint. Some fragments require light grinding and thorough cleaning of dirt and dust. Before impregnation, the surface must be thoroughly cleaned.
It is necessary to use a special impregnating agent that protects the wood from adverse weather conditions. It is important to apply impregnating bases in accordance with the direction of the wood grain. It is recommended to apply at least 2 layers of impregnation. Impregnation plays an important role:
- protects wood from excessive moisture absorption;
- prevent mold growth;
- prevents the proliferation of fungi.
Some impregnations contain dyes that allow you to paint the wood in a selected color, similar to a specific type of wood. The texture pattern will remain visible. If the impregnation does not contain dyes, it is necessary to apply varnish or paint.

Design safety
The greatest risks are associated with the possibility of falling; they should be minimized:
- The house is installed low. A height of 1.5-2 meters above the ground is most suitable. Although falling from such a height is traumatic.
- A security fence or railing needs to be installed around the platform. Ideally, the height of the railing is 70-90 cm, the distance between vertical balusters is 10-15 cm.
- You should not place a concrete platform or paving stones under the house. It’s a good idea to pour soft material (sand, sawdust) or make a green lawn. When falling, the child will land on fairly soft ground.
Interior design and play space
The design of the house inside is tailored to the interests of the children. You can include the following items:
- boys and girls like to play Board games;
- good ideas - put up a mini table football, dollhouse;
- You should place a basketball hoop on the tree;
- in the house, under the platform, a table with pencils and paints will be useful;
- a small bench with soft cushions;
- inflatable chair;
- bed with easy-to-clean air mattress;
- if the child is small - under the house, you can install a sandbox, slide, small swing;
- wooden toy box;
- paintings on the walls.


The idea of creating a house from pallets
The process of building a house from pallets is not much different from the one presented above. For the construction of a “building” of standard sizes, with an area of 2 square meters. meter will require 10-12 pallets. Half of the pallets are fully used, from the rest we will take only the top layer.


Hut for adults
A cozy tree house is the dream of many adults. Building a treehouse for children and adults is a more challenging task. In such a situation, it is worth taking the help of professionals who guarantee a durable, sustainable, and most optimal solution.
In our country, tree houses for adults are not common. In the USA, Germany, Austria, tree houses with full equipment are becoming popular.
Below are the original huts in different parts peace.


Scotland

USA, Dakota

Bratislava, hotel


Photo gallery of interesting ideas


Conclusion
Everyone in childhood dreamed of a cozy, quiet house on a tall tree. The hut can be hung on a tree, but it is much safer to build a house under a tree, mounted on beams fixed in the ground. Then you can easily set up a small playground under the house, attach a swing, a slide, and hang a hammock under the platform. Making a structure with your own hands is quite difficult - you need to properly secure the base, provide supports, build walls, a roof, and stairs. Creating a wooden house for children requires a lot of work, time and effort, the joy on the faces of loved ones will certainly make up for the inconvenience of design and construction.
How to build a tree house, a great playground for young and middle-aged children school age? There is nothing complicated. You just need to build it right. So, in order to protect its future “tenants” as much as possible.
 How to build a tree house, an excellent playground for children of primary and secondary school age? There is nothing complicated
 When thinking about how to build a treehouse, many people do not know how to do it. The material below and the photos provided here will help you make a decision and implement it.
For example, you can build it around a trunk.
You can make additional supports from logs. The photo shows happy boys playing with pleasure on such an unusual playground.
We will consider the simplest option - building a house between the trees. You can see one of the options in the photo.
It is unlikely that you will be able to build such a home alone, so first of all you need to find a person who will help you. You will also need two stable stepladders, a hammer, nails, staples and building material (boards, slats and beams, roofing). When everything is ready, you can begin construction.
 It is unlikely that you will be able to build such a home alone, so first of all you need to find a person who will help you
 First, select the trees on which the house will be located. It can be one large spreading tree or 2 or 3 trees growing nearby. The latter are much easier to find.
Let's look at the stages of building such a house on three trees located at a short distance from each other. The house should not be built too high. The trunks in the place where it will be located must be thick enough and strong.
First, a foundation is built on which the house will rest. Like the foundation on the ground, the foundation for such a house at a height must also be strong. It is built from thick timber, which is attached to the trees with brackets. You can make the base from boards, but from timber it will be stronger.
Then thinner square or rectangular bars, installed vertically, are attached to the beam. They will “outline” the wall. It should look like a box. The scheme is quite simple - thinner bars rest on the base beam, which are connected to each other.
Then the floor is laid. The boards must be strong enough to completely prevent them from breaking. If the floor of a tree house breaks, it can cause serious injury. After the floor is ready, rafters for the roof are installed. It will be easier to install them, because the stepladder can be placed on the floor.

To make a roof covering, choose a lightweight material. For example, you can cover the roof with waterproof plywood, on which you can then lay soft tiles. There is an option to simply cover the roof with roofing felt and build a decorative covering of straw on top.
After installing the roof, you can begin building the walls. It's quite simple. Place the boards onto vertically positioned timbers. You can stuff it both from the outside of the house and from the inside. Since this is a summer building, no thermal insulation is required.
Tree house for children (video)
Interior of a tree house
If you built a house for children, then consult with them what they want the house to look like from the inside. You can install a table and stools and a small bed there. Or you can decorate it like a ship’s cabin. It all depends on the imagination of the children and on your abilities.
You just need to follow one thing important condition– there should be no objects in the house that could cause it to catch fire. Avoid candles and incense sticks with pyramids completely. When supplying electricity to such a wooden building, entrust it to professionals and install a high-quality circuit breaker that will turn off the electricity in the event of a short circuit.
 To make a roof covering, choose a lightweight material
 Gallery: tree house (25 photos)


We equip the stairs
How to build a house with safe entry? After all, you will have to rise several meters above the ground. Pay enough attention to the construction of a high-quality staircase. It must have railings. But a house built for children can be equipped with a rope ladder. And the children are interested, and you have less work. If you want to make an ordinary staircase, then the easiest way would be to take a large and high-quality extension ladder, secure it well and make the steps wider. Do not forget about the railings that a person will hold on to when ascending and descending.

Additional Security Measures
If children will play in a house built on a tree, it would be a good idea to take additional safety measures. An excellent solution would be to stretch a mesh between the house and the ground. If it is present, the child will not be injured, even if he falls down the stairs, out of a window or falls out of a doorway.
 If children will play in a house built on a tree, it would be a good idea to take additional safety measures
 DIY tree houses for children are gaining more and more popularity. Many people build them on their summer cottage or in the courtyard of a private house. Moreover, you can subsequently find other uses for such a structure. Tree houses built with your own hands will bring you a lot of joy, because it is always pleasant to contemplate your work. To gain experience, you only need to build once and then you will be able to build tree houses without much difficulty. For example, when changing your place of residence or buying a new one summer cottage. You can quickly build such buildings for different needs. For example, this can be a great place to retreat if you are into meditation.
DIY tree house (video)
Other uses for this structure
The construction of such a structure for children was considered. Now you know how to make a tree house and have gained some experience in it. No special skills are required and any man can do this work. You no longer think that making a treehouse with your own hands is difficult. But such a structure can serve not only a gaming function. When the children grow up, you can use the finished building for other purposes. For example, make a hunting lodge there, a place to relax, and even a billiard room, if the floor is level enough. You can also make the exterior design of the house different, for example, cover the facade with clapboard. You can also add a more convenient staircase. Tree houses built with your own hands will become your pride. After all, your imagination is not limited by anything, and you can give it free rein. This will be a kind of creativity, which is also useful. We really hope that you have found comprehensive information in the material presented. And you will definitely try to build such a house.
Attention, TODAY only!
Many parents ask how to build a tree house for children, what kind of tree should be used for construction, materials and tools, what will be needed for work.
A tree house for children must first and foremost be safe. This means that its height above the ground should not exceed a certain value, and the thickness of the trunk should not be less than 30 cm in diameter.
Construction process simple house on the tree
It must have a fence railing. And besides this, when making a tree house, you need to take into account many more different factors:

Choosing a tree to build
If you decide to make a treehouse with your own hands, then first you need to find a suitable place to build it. There are a number of criteria that need to be taken into account when choosing. These include:
- the composition of the soil around the tree;
- type (species) of wood;
- his age;
- condition of branches and trunk;
- crown volume.
Now we will consider in detail each of the selection parameters. The foundation for construction should be on normal, not sandy soil. Otherwise, the trunk will collapse under the additional weight that the tree house will create.
 An example of a tree with a built children's house
 The type of wood significantly influences the choice. It is better to exclude pine, like other conifers, immediately. Sharp needles can injure a child, and the resinous trunk will create a lot of problems with washing clothes and bathing the children. Linden wood is too soft, and poplar, willow and chestnut wood is weak root system. Therefore, a do-it-yourself tree house is most often built on oak or maple. They have not only solid wood, but also a branched crown, convenient for installing a platform.
Of the fruit trees to install a small house, an apple tree is suitable. But it is only suitable for children; its branches may not be able to withstand adults.
The tree chosen for construction should not be young or old. And the more branches there are, the better the result. Please note that the thickness of the branches on which the tree house for children will be mounted should not be less than 20 cm.
Read also
Slides for the garden
 Diagram with dimensions and layout of a children's tree house
 If there are dry branches near the building, they must be removed. If children happen to lean on them while playing, they may fall when the dry wood breaks under their weight. Crown volume is also important. The larger it is, the more points there will be for fixing structural elements.
Project drawing
Before starting work and before purchasing the materials needed to build a tree house, it is necessary. It takes into account all elements, compiles dimensions and verifies proportions.
It is imperative to involve children in working on the project. After all, they are future residents, and their opinion must be taken into account. As a result, the home craftsman will be able to create a magical place for games and entertainment. The first step is to make a sketch. To do this, the future house is drawn on plain paper, without dimensions or proportions.
 Treehouse drawing
 Having agreed on the design, they begin to make real drawings. In them, the structure is drawn to scale, indicating all the data and exact numbers.
The diagram must be made in at least three projections - front view, bottom view and side view. It will be good if the master draws a separate drawing for each side. It is better to draw on graph paper, it has ready-made guides. To work on the project you will need:
- drawing pencil;
- ruler;
- square;
- washing gum.
It would be better if there were two types of pencils, with hard and soft cores. The sketch is made first, and the outline is drawn second. The diagram will help not only with work, but also with the preparation of materials. The master will be able to calculate their number so as not to spend extra money.
Choosing tools and materials
Traditionally, a children's tree house is made from dried and pre-prepared wood. The frame is made of timber with a cross-section of at least 5 cm, boards are used for the floor, and the walls can be sheathed with sheets of plywood or the same boards. For the roof, plywood is used, on top of which a soft roof is laid, imitating tiles, like in a real fairy-tale house.
Pine boards are used as the main material. It is affordable and easy to process. And with high-quality processing and drying, this type of wood can serve little owners for more than one year.
Metal corners and brackets are used as fasteners, and all elements are fixed with self-tapping screws and bolts with nuts and washers. A DIY tree house requires a certain set of tools. The master will need:
 Treehouse design option
 - hacksaw or jigsaw;
- hammer;
- drill;
- screwdriver;
- pliers.
In his work, the master will also need measuring tools, such as:
- level;
- plumb line;
- roulette;
- drawing pencil;
- square
Summer is approaching - it’s time for children to run around the streets all day long and invent “headquarters” for themselves. Hiding from parents to joke, eat ice cream, look around the surroundings. The perfect solution- a house located right on a tree. The task of building such a house is a responsible one, but feasible even for those who are far from engineering. We will tell you how to build a treehouse with your own hands, spending a minimum of time and money. In this article we will walk through the entire process step by step - from the idea to the final touches.
By the way! It is believed that such huts are a chance exclusively for owners of private housing, and for such luxury you need your own land plot. However, there are examples where similar ideas were implemented in the courtyard of an ordinary apartment complex or in a public park. The main thing is to create a team of like-minded people.
Choosing a suitable tree. We are looking for an adult, but not too old, preferably straight.
We remove dry, diseased branches, as well as low-growing shoots, putty the cuts, and paint the top.
Important! The bark can only be cut to half the depth, otherwise we risk destroying the tree.

Study the shape and direction of the crown. When we build a tree house, we take into account its possible changes over time. You can take several photographs from different angles and sketch out a diagram of the future structure directly on them. Think about how the child will climb up and calculate a safe height. From experience, the most comfortable thing for children is to rise a head or two above their parents’ height. For very young children, a structure that rises no more than a meter and a half above the ground is more suitable.
For construction you will need tools and building materials.
Important! When designing a small, cozy space, whenever possible, try to choose lightweight materials to reduce the load.
In this matter, a lot depends on the project, especially on the method of attaching the platform. Let us consider the options further when describing the construction of a tree house.

Here is a universal list of tools that we will need:
- jigsaw;
- plane;
- chisel;
- saw;
- hammer;
- wrench;
- drill;
- screwdriver;
- jigsaw;
- fasteners: screws, nails, angles, anchor bolts;
- level;
- roulette;
- ladder;
- gloves, overalls.
Wood building materials
For an average-sized house you will need approximately the following set:
- two boards measuring 5*25 cm - load-bearing beams;
- six boards measuring 5*15 cm - a frame for the base of the floor;

Based on the preferred type of support:
- two boards measuring 5*10 cm, 4 meters long - inclined support elements for the supporting structure;
- logs with a cross-section of 20 cm (about 1 meter longer than the distance from the ground to the base of the platform, the quantity depends on the project).
Please note! The calculation of materials is approximate, check the quantities and dimensions with your project. Remember how many children you estimate will be able to be in the house at the same time.
Determining the main support for the structure
There are two options:
- Piles in the ground (the most careful choice in relation to a tree, which will also provide additional safety. Do not forget that our house, located on a tree, will be incredibly popular with children and will be subject to serious loads);
- Diagonal supports in the body of the tree (we use it mainly when it bifurcates from the ground, and you are absolutely confident in its reliability and strength).

We build piles
If we prefer a structure on stilts, we make them first.
Important! Before starting work, we treat boards, timber, and plywood with a special antiseptic compound that protects the wood from rotting, as well as a fire retardant. Dry in the sun. Piles in places that will go into the ground are additionally covered with bitumen mastic, grease, or impregnated with oil waste.
On the trunks of the fork, we mark the attachment points of the beams of the supporting supports (at the same height from the ground) and indicate the position of the platform by measuring the distance between these points. We draw a perpendicular to the ground from the corners of the base and mark the resulting points with pegs. We dig holes under the load-bearing beams so that there is an indentation on each side of the house platform of approximately 1/3 of the entire length of the floor.
The optimal depth of each hole is 1.2-1.4 meters, diameter 25-30 cm. Place sand approximately 10 cm from the bottom, and crushed stone another 10 cm. After we lowered our beams inside, we definitely need to level them and make temporary reinforcements using wooden spacers or cinder blocks. The piles must be level and vertical.
By the way! Often a tree trunk is used as one of the load-bearing supports, which significantly saves time, effort, material, and adds a natural appearance.
Fill the holes with cement, let them dry thoroughly, then remove the temporary spacers and proceed to the next stage.
We mount the platform
If we decide that the tree itself will serve as one of the supports, the method of installing the box will be quite simple. We attach the beam raised to the frame of our house with both ends to the piles, in the center - to the tree trunk. We do the same with the beam on the other side, level the fixed beams, and fill the remaining ones perpendicularly from above, keeping a step of approximately 50 cm. We also connect all the elements with metal plates.
In the case when we use only piles for support, the process will be slightly different. First we need to build a box from timber, which we will cut to the length we need. We attach the supporting beams of the box along the perimeter of its lower part. We align each element horizontally, raising it to the floor level.
Please note that the process of creating the “foundation” of a house requires meticulousness and frequent use of a level; the structure must be absolutely vertical. Next, we fasten both ends to the inside of the pillars with 15-20 cm bolts (we use long ones, since fastening with many short bolts will destroy the structure of a living tree). Ready. Now we reinforce the harness with metal plates at the corners.

Inside the manufactured box, we fill additional bars in parallel at a distance of 20-30 cm from each other. From below we strengthen our frame with two boards, which we place across on both sides of the trunk. We additionally strengthen the internal connections with metal plates on bolts.
Please note! When the tree's branches sway, they move the foundation of the house, gradually destroying it. To avoid this, use a sliding fastening of the beams to the tree. Using a drill and jigsaw, make a groove 10 cm long, first marking the center.
If we attach the frame only to wood
At a distance of 30 cm below the floor level, we nail two beams on both sides of the trunk. We mount the remaining beams on them perpendicularly, maintain a distance of 50-70 cm, and connect the ends with thick, strong boards. The result is a rectangle located horizontally, which must be strengthened with additional spacers. To do this, support the frame with inclined beams of the same section. At the points of attachment to the base of the platform, we cut the boards at an angle of 45 degrees. The lower edges of the supports are brought into the trunk, where they are secured, having previously been connected to each other, while the upper ends rest against the outer beams of the frame.
By the way! At this stage, you can climb onto the frame and build a rope lifting mechanism. It will definitely come in handy for further construction and for children’s games later.

Laying the floor
For fencing, roofing and flooring elements, it is best to use lightweight materials - various types of plywood, chipboards.
The hardest part is making the correct holes for the barrels. To do this, lay the boards next to each other on the ground, measure the circumferences of the branches and cut out the corresponding holes. Please note that you need to leave a centimeter gap to the bark. When laying the boards on the frame, we make a distance of 2-3 cm between them so that the water can drain away. We use screws and nails to attach the flooring to the base.
Tree houses require a responsible approach in everything. After laying the floor, walk around it and make sure that it does not creak or wobble. If in doubt, it is better to correct it, strengthen it, because we are talking about the safety of children.
We build walls
Strong and durable walls are installed on the frame, as is the floor. You can take a beam with a section of 50*50 mm, cut to the height you need. We fasten it with anchor bolts to the protrusions of the support beams of each corner of the “foundation”. We retreat 40-50 cm from the corner posts and at this distance we place intermediate posts, securing them to the outside of the base of the frame.

Attention! Attaching racks directly to the floor is extremely unreliable; avoid this method of installation.
We equip all racks with spacers from below and refine them appearance, covered with boards or plywood. Often, tree houses are treated with resin-based sealants, placing it in the cracks on the walls and roof. This will protect the structure from the penetration of excess moisture, wind, and cold air.
If desired, choose the number and shape of windows.
We install the roof
The easiest and easiest roof to implement is a canopy. Two meters up from the walls we are looking for two good strong branches into which we need to screw two hooks. We stretch a cable or rope between them, and throw a large piece of tarpaulin over it. We stretch and secure the fabric in the corners and along the perimeter.
How to make a treehouse with a real, serious roof? This is a little more complicated and takes longer, but it will look very profitable. You will need to build a reinforcement from timber, which is installed on the top of the corner posts, fixing at the edges. Then we assemble two trusses, to connect them we use two wide boards (we attach them to the upper corner of the rafters), and install them above the walls opposite each other. We put lightweight material on top - ondulin, corrugated sheets, polycarbonate - to your taste.

Choosing a staircase
There are options here too. Moreover, tree houses often have several stairs at the same time. The most common interesting performances:
- rope;
- screw stepped;
- shield with slots;
- Particularly popular are stairs made in the form of a small climbing wall with multi-colored holds of funny shapes;
- the child will be delighted if he can climb up to his shelter using a rope (be sure to take into account the height, age of the baby and his climbing skills).
We assemble this part of the house on the ground and secure it with outside"foundation" using plates and bolts. We test for strength: the ladder should not wobble. If there are railings, they must correspond to the height of the children and be reliable and stable. After checking, we treat the staircase structure with a primer and antiseptic and paint it.

Redecorating
Now you know how to build a tree house. All that remains is to “comb” it. We adhere to the golden rule - the most lightweight materials possible. The house can be painted in cheerful colors on the outside and decorated with textile decorative elements on the inside. Build soft sofas and pillows, put a plastic table that will fit well into an eco-friendly interior if covered with burlap.
Advice! From the inside, check the walls for any protruding sharp chips; they will need to be treated.
Inside, you can organize an exhibition of children's works or arrange “reading rooms” there on certain days of the week and, in accordance with this, select pieces of furniture and decor.